Fixing so-called “dishwasher safe” products

Got a “dishwasher safe” product whose shape is actually not suitable for a dishwasher at all? You’re not alone.

In fact, it’s shocking how many allegedly dishwasher friendly products out there obviously weren’t optimised for dishwashers, shape-wise.

Considering that in a free market, supply would ultimately be driven by demand, i.e. our purchases, one can “guesstimate” how little time and thought most people (yours truly too) apparently spend for purchasing decisions related to such everyday products! Then again, at least the engineers designing those products must have spent a couple of days thinking through their designs, one would hope. How could they end up with such inadequate designs, and how could those even pass internal product testing and quality assurance assessments? It’s probably due to market imperfections indeed.

E.g. look at this inconspicuous, allegedly officially “dishwasher safe” plastic mug:

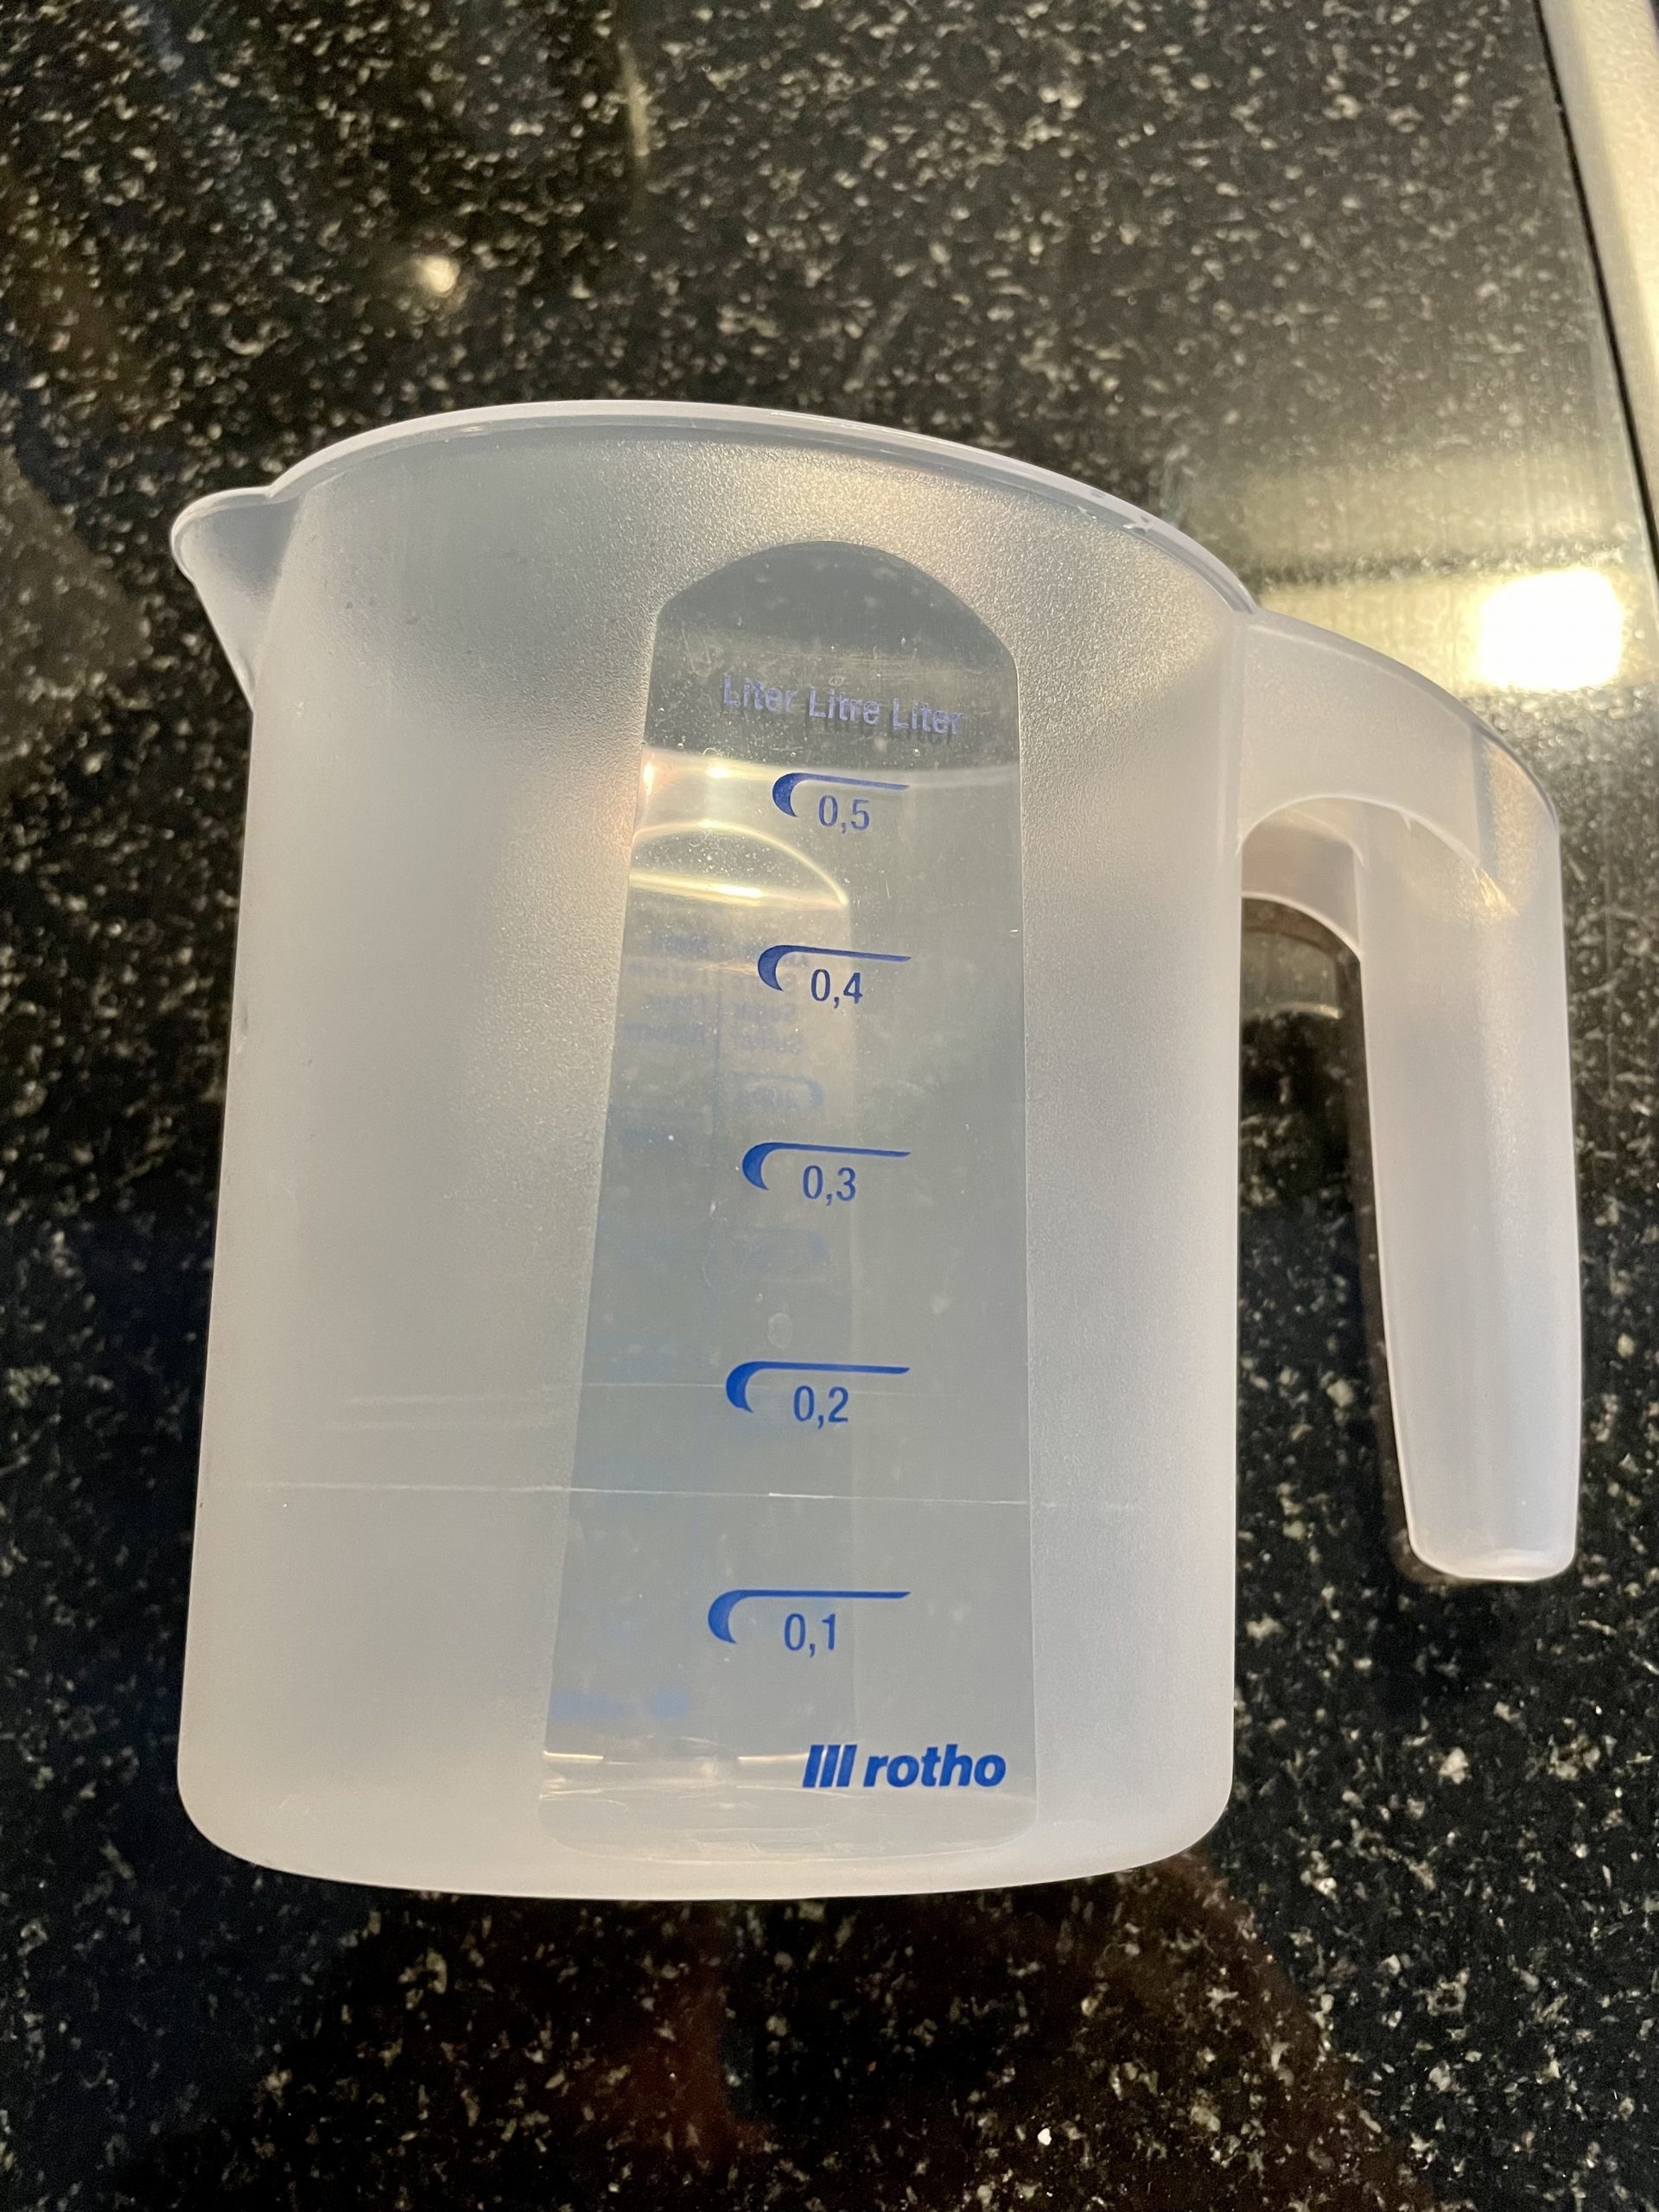
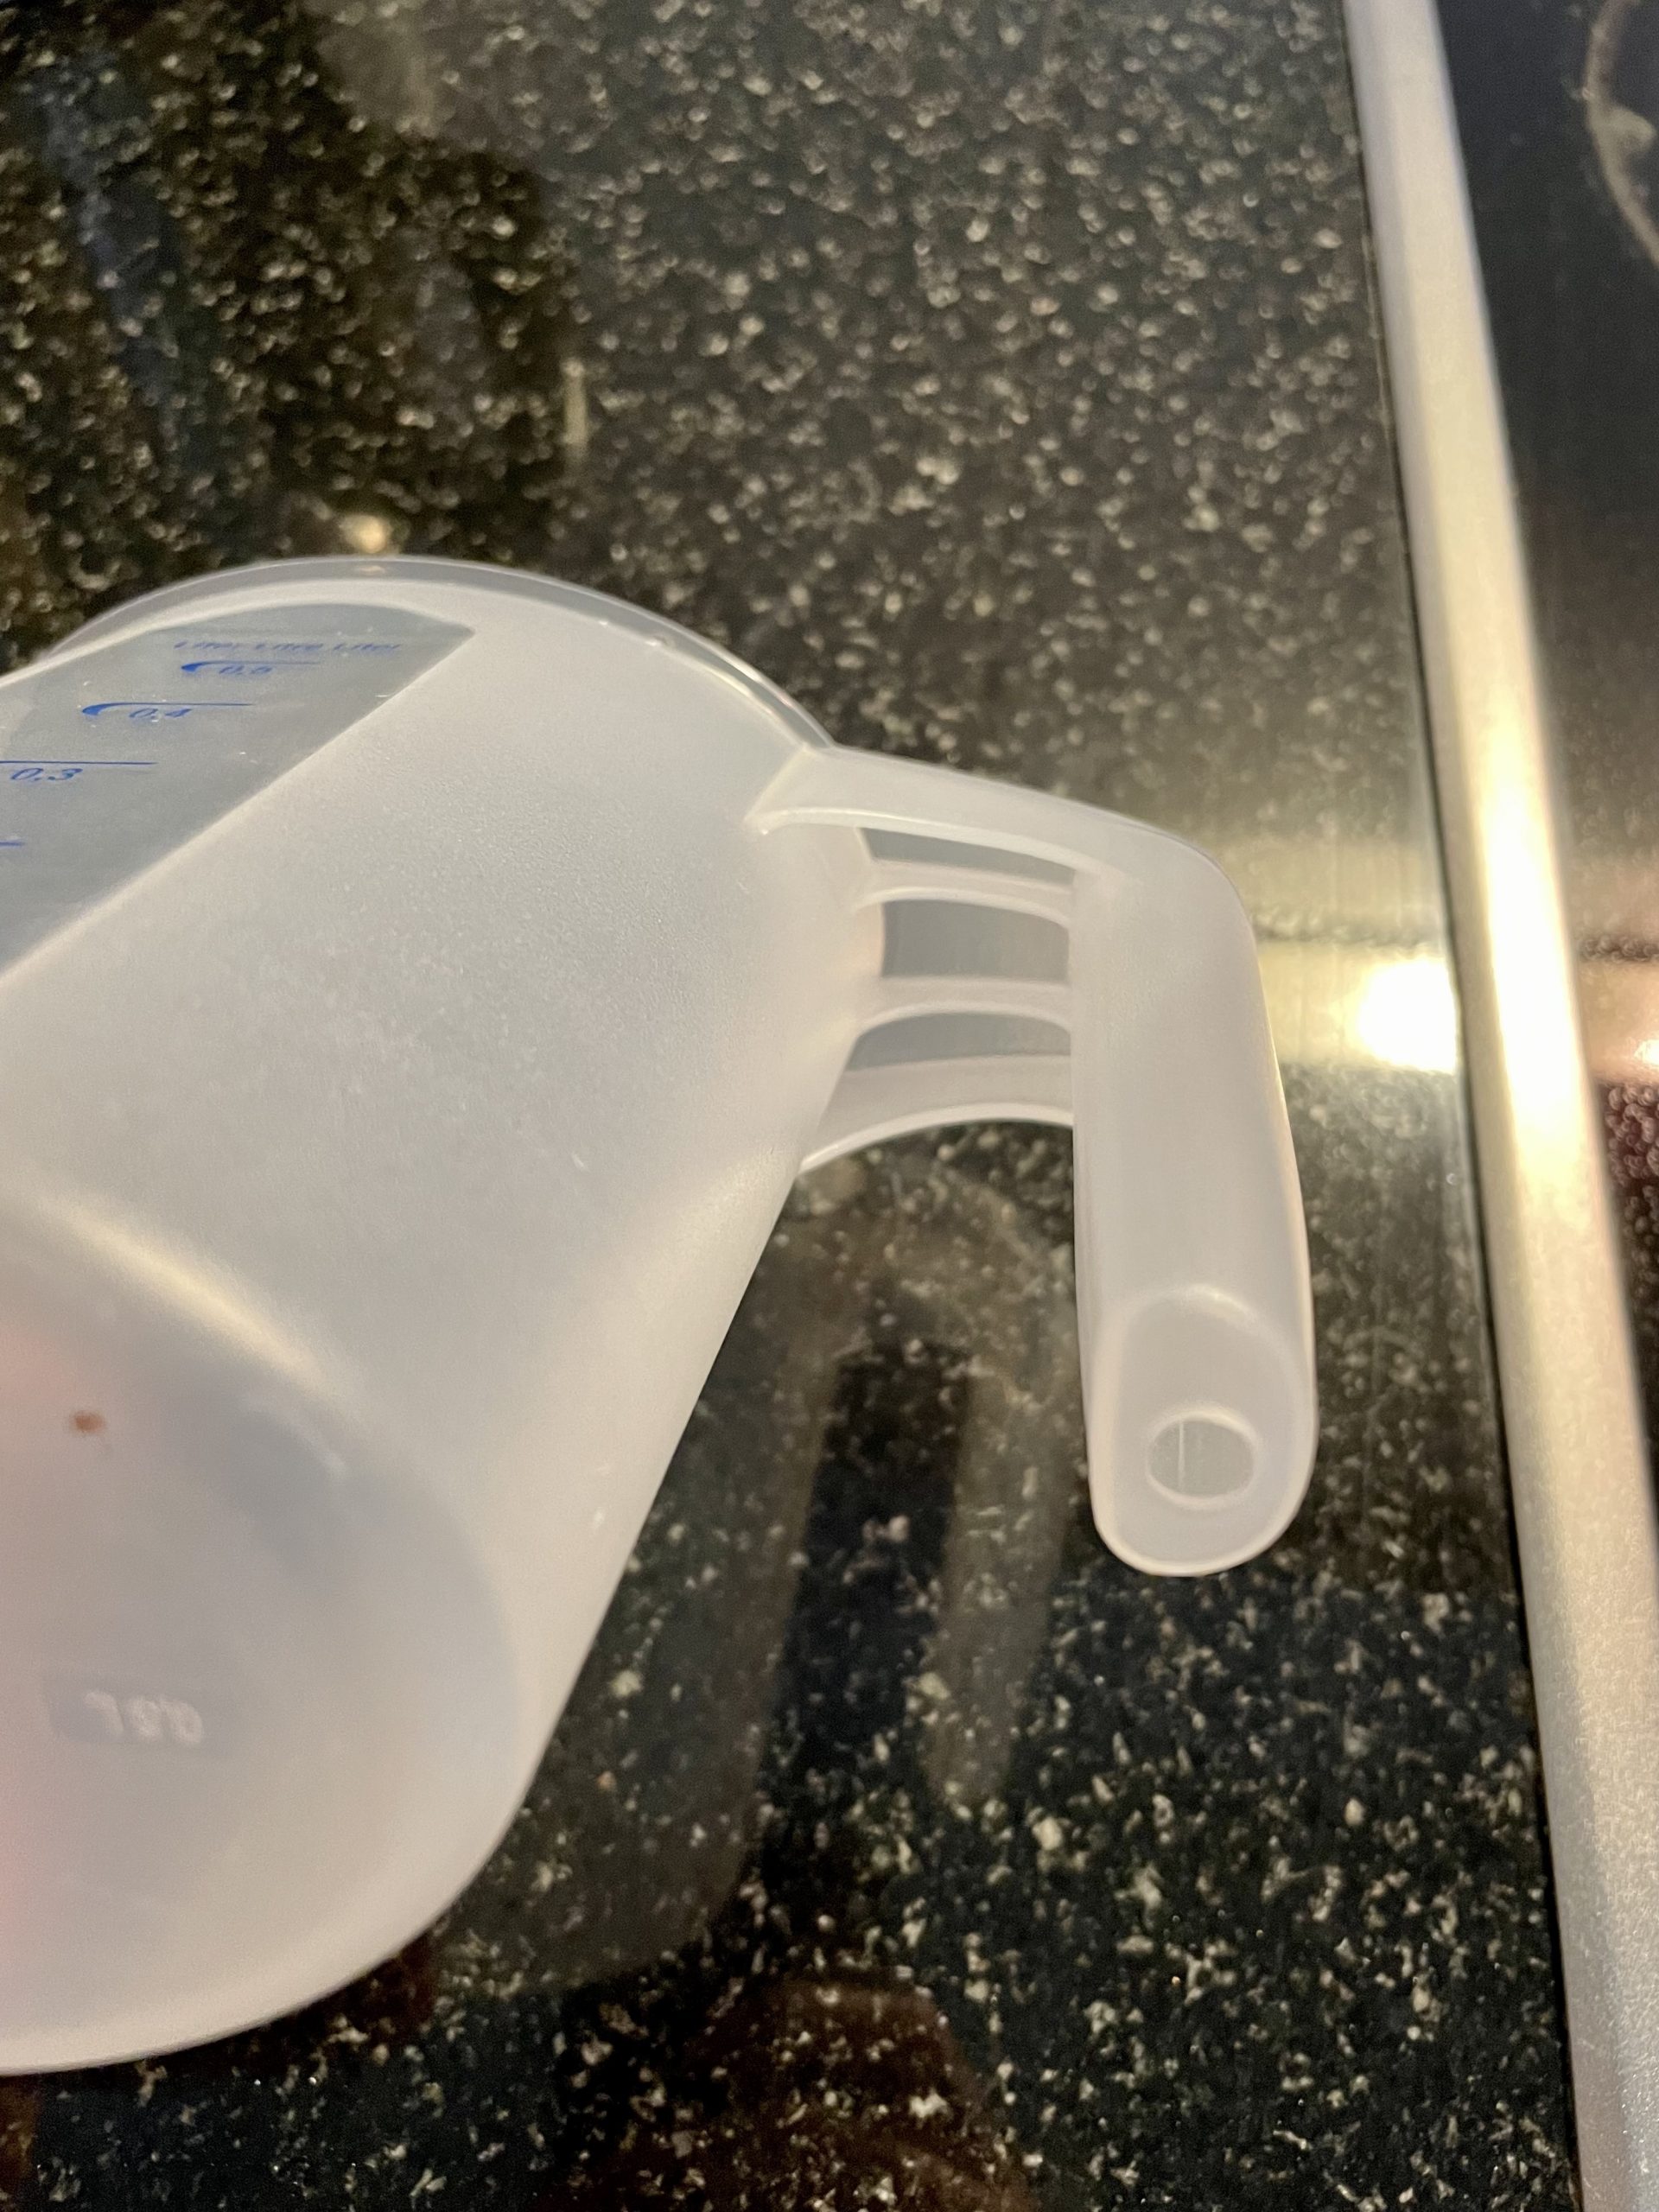
As you can see: Its designer DID think of making a drainage hole at the bottom of the hollow handle. Dishwater would thus drain from it and not collect.

But what’s the point of that hole anyway, if water can’t and isn’t supposed to drain from the mug? As a mug, by design, is not supposed to leak liquids.
In other words: Who on earth would place this mug in the dishwasher in upright position, for dishwater to collect in the mug itself?
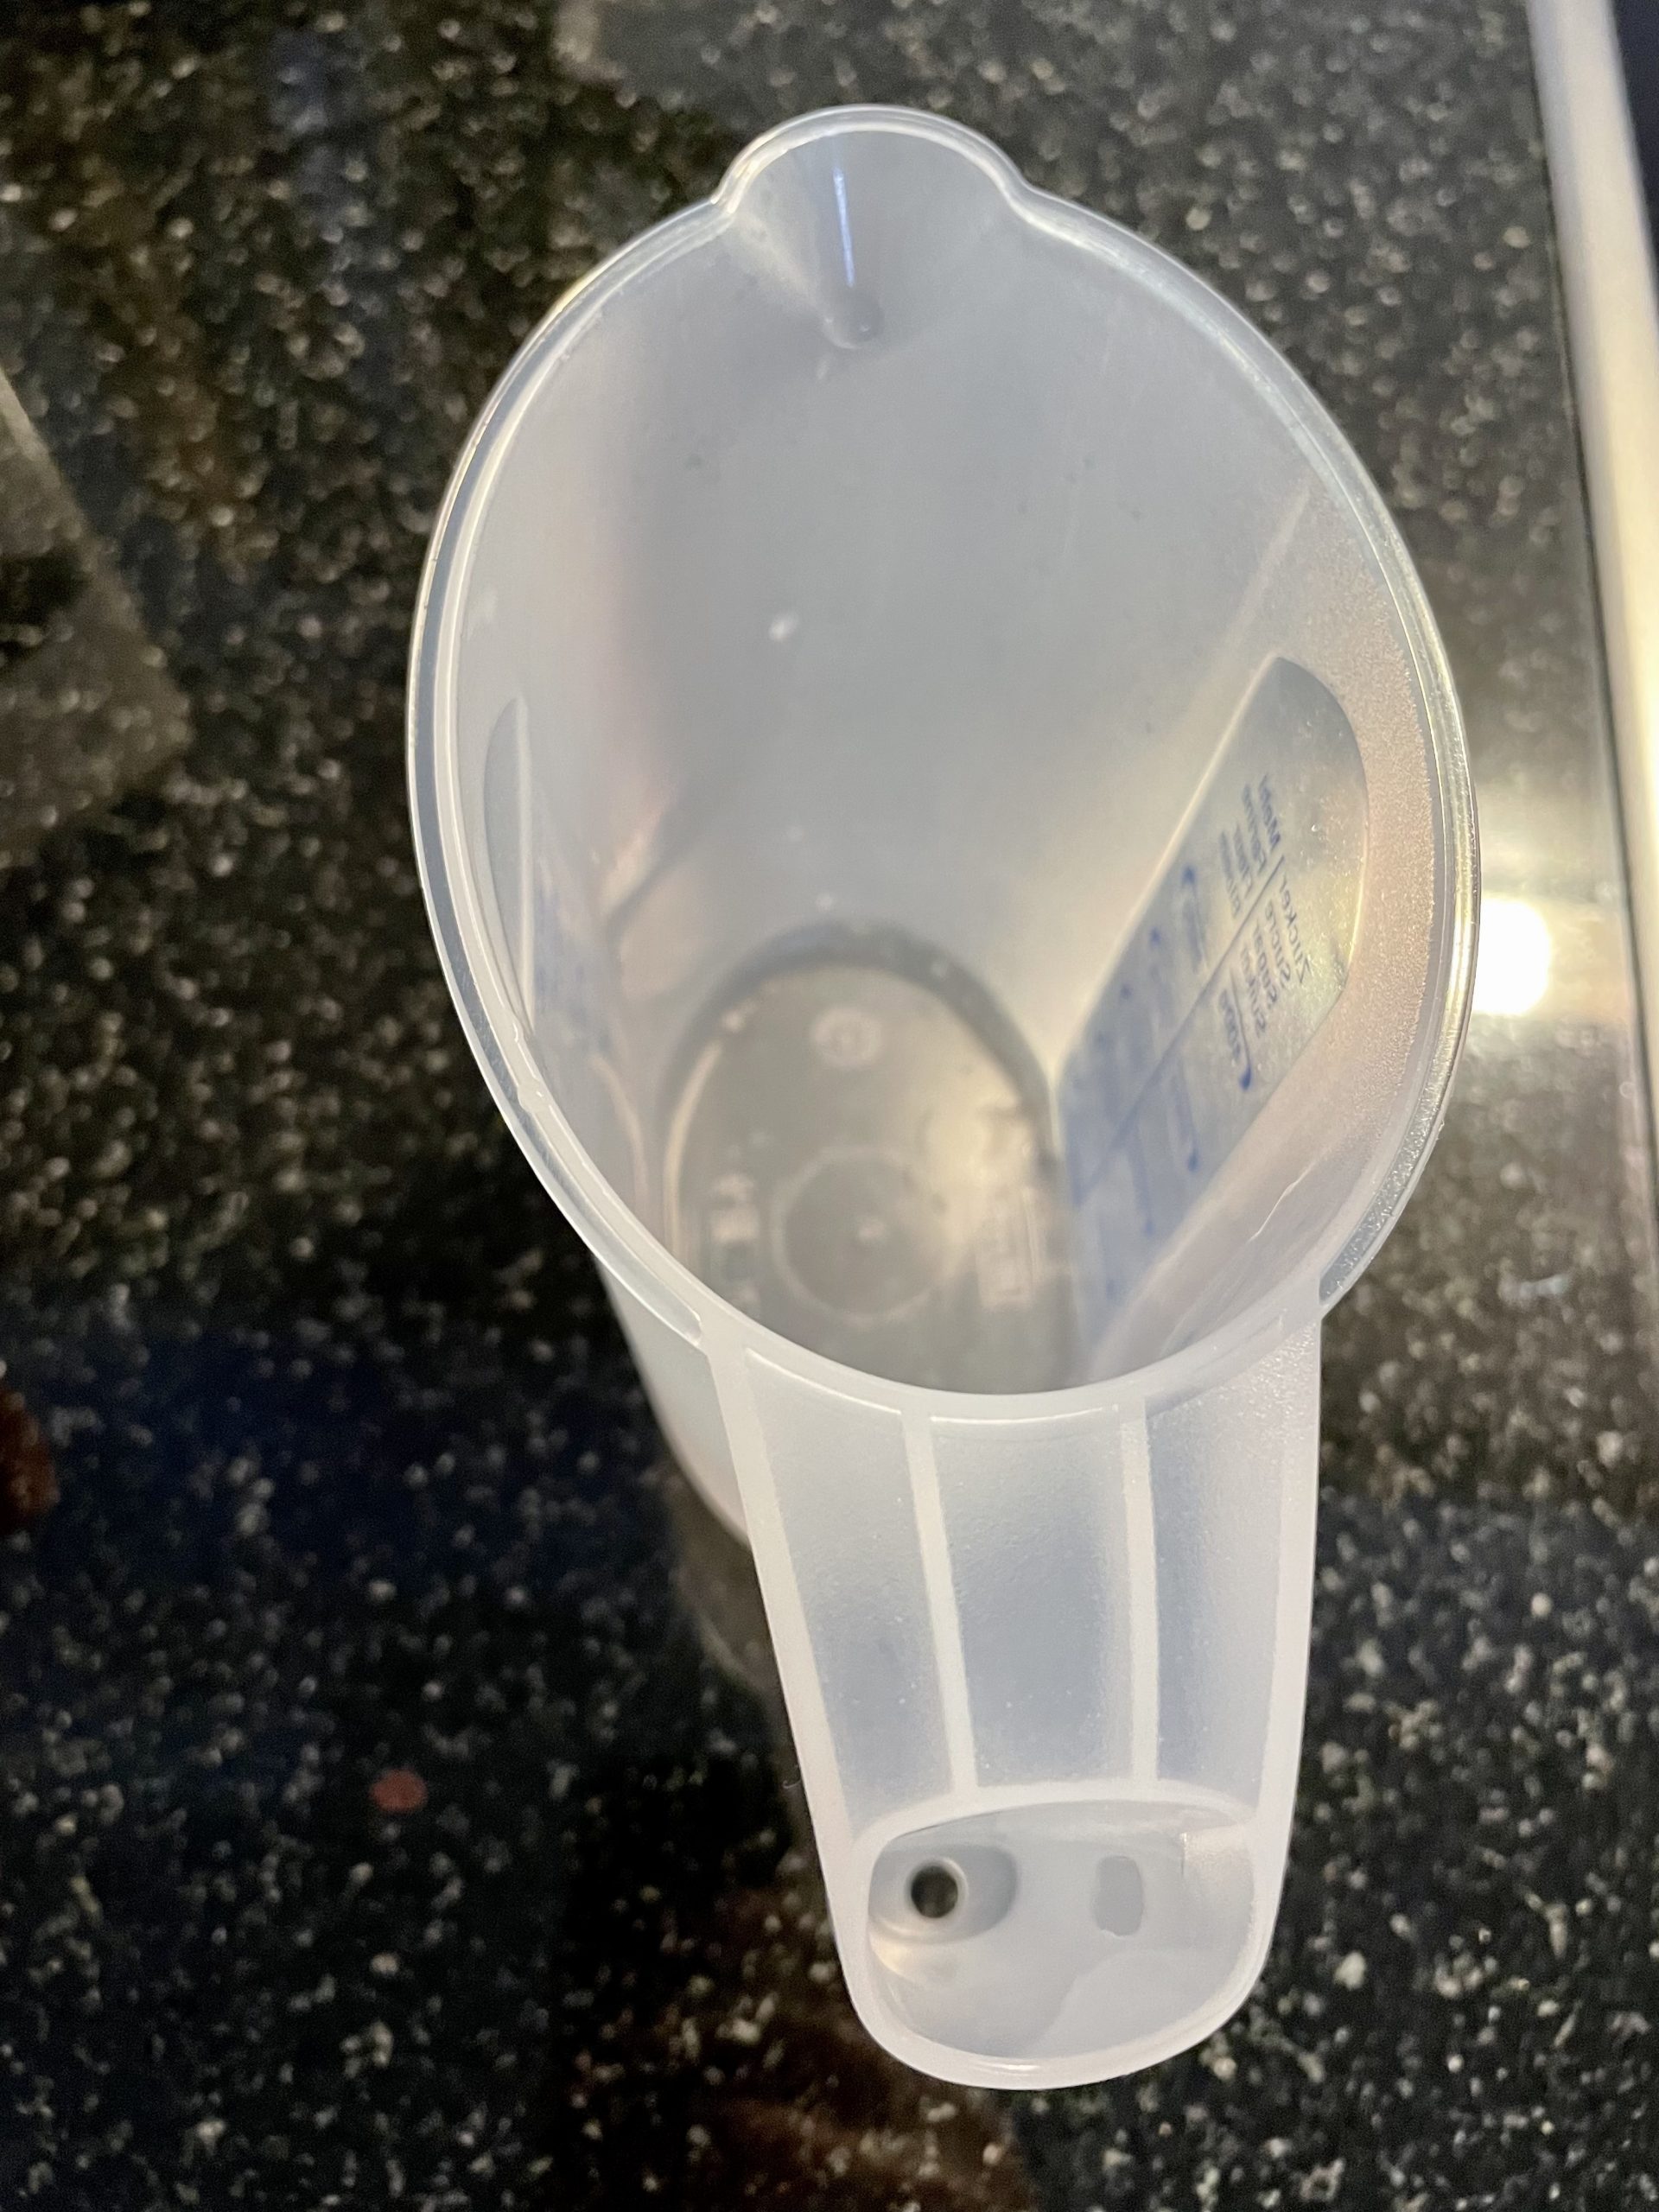
So, the only reasonable way to put this mug into the dishwasher would be upside-down. Which voids the whole point for that drainage hole in the hollow handle, except maybe to release hot steam, lowering the maximum heat the plastic handle would have to withstand (but what about the ascending hot steam that will be collected in the mug itself? Heat-deforming the bottom of the mug would be even worse than heat-deforming the bottom of the handle)

If we placed this mug correctly, i.e. upside-down in the dishwasher, dishwater would instead collect in the now concave, open part where the handle is attached to the mug. As strangely, the designer apparently didn’t think of designing holes there (or of sealing off the whole handle, making all surfaces convex), so that water could drain between the fins.

What can you do?

  1. Make it a habit: Before purchasing any such item, think twice about how you would place it in the dishwasher and whether dishwater could fully drain from the product like that. Don’t simply rely on the “dishwasher safe” symbol on the packaging, as that (sadly) doesn’t cover the shape of the product, only its materials (all products shown in this blog post ironically have an embossed “dishwasher safe” logo)
  2. For those faulty “dishwasher-friendly” products you already own, take a drill and drill some holes in appropriate places yourself (keep in mind structural stability too though). Or, probably better for most plastics, use a heated awl to create clean holes without splinters.
  3. If you are a product designer, please think more thoroughly when designing your next product. Obviously, the free market isn’t as perfect as consumers would wish for, and thus likely wouldn’t punish you as hard for releasing a suboptimal or faulty product as you’d deserve. Please think through the designs of your products nonetheless, before considering them ready for production release.
    IOW: Minimalism isn’t a bad principle per se (actually beneficial in many situations), but always know when to apply it and when not to apply it (i.e. invest a bit more in thinking -> your brain will automatically protect you from overthinking anyway, e.g. in “fight or flight” situations).
    In the long run, both the selling market and the job market should reward your superior work and work ethics.
  4. If you’re specifying requirements for certification labels: Please think thoroughly, and particularly also think from an end-user’s perspective. In the end, a label/certification should help purchasers to make better purchasing decisions and sellers of good, certified products to differentiate more visibly from their inferior competitors.
    A disclaimer regarding the above example: The “dishwasher safe” logo might not actually be an official, certified label, despite its pretty uniform look. It nonetheless raises the question: What’s the value of a “dishwasher safe” logo if that only covers the materials, but not also the shape of the product? From a purchaser’s perspective, an allegedly “dishwasher safe” product that doesn’t allow all dishwater to drain at least in one viable, stable position in the dishwasher is just as useless as a product that severely deforms, shrinks or melts in the dishwasher. That logo should thus cover both materials and shape (i.e. form and function).

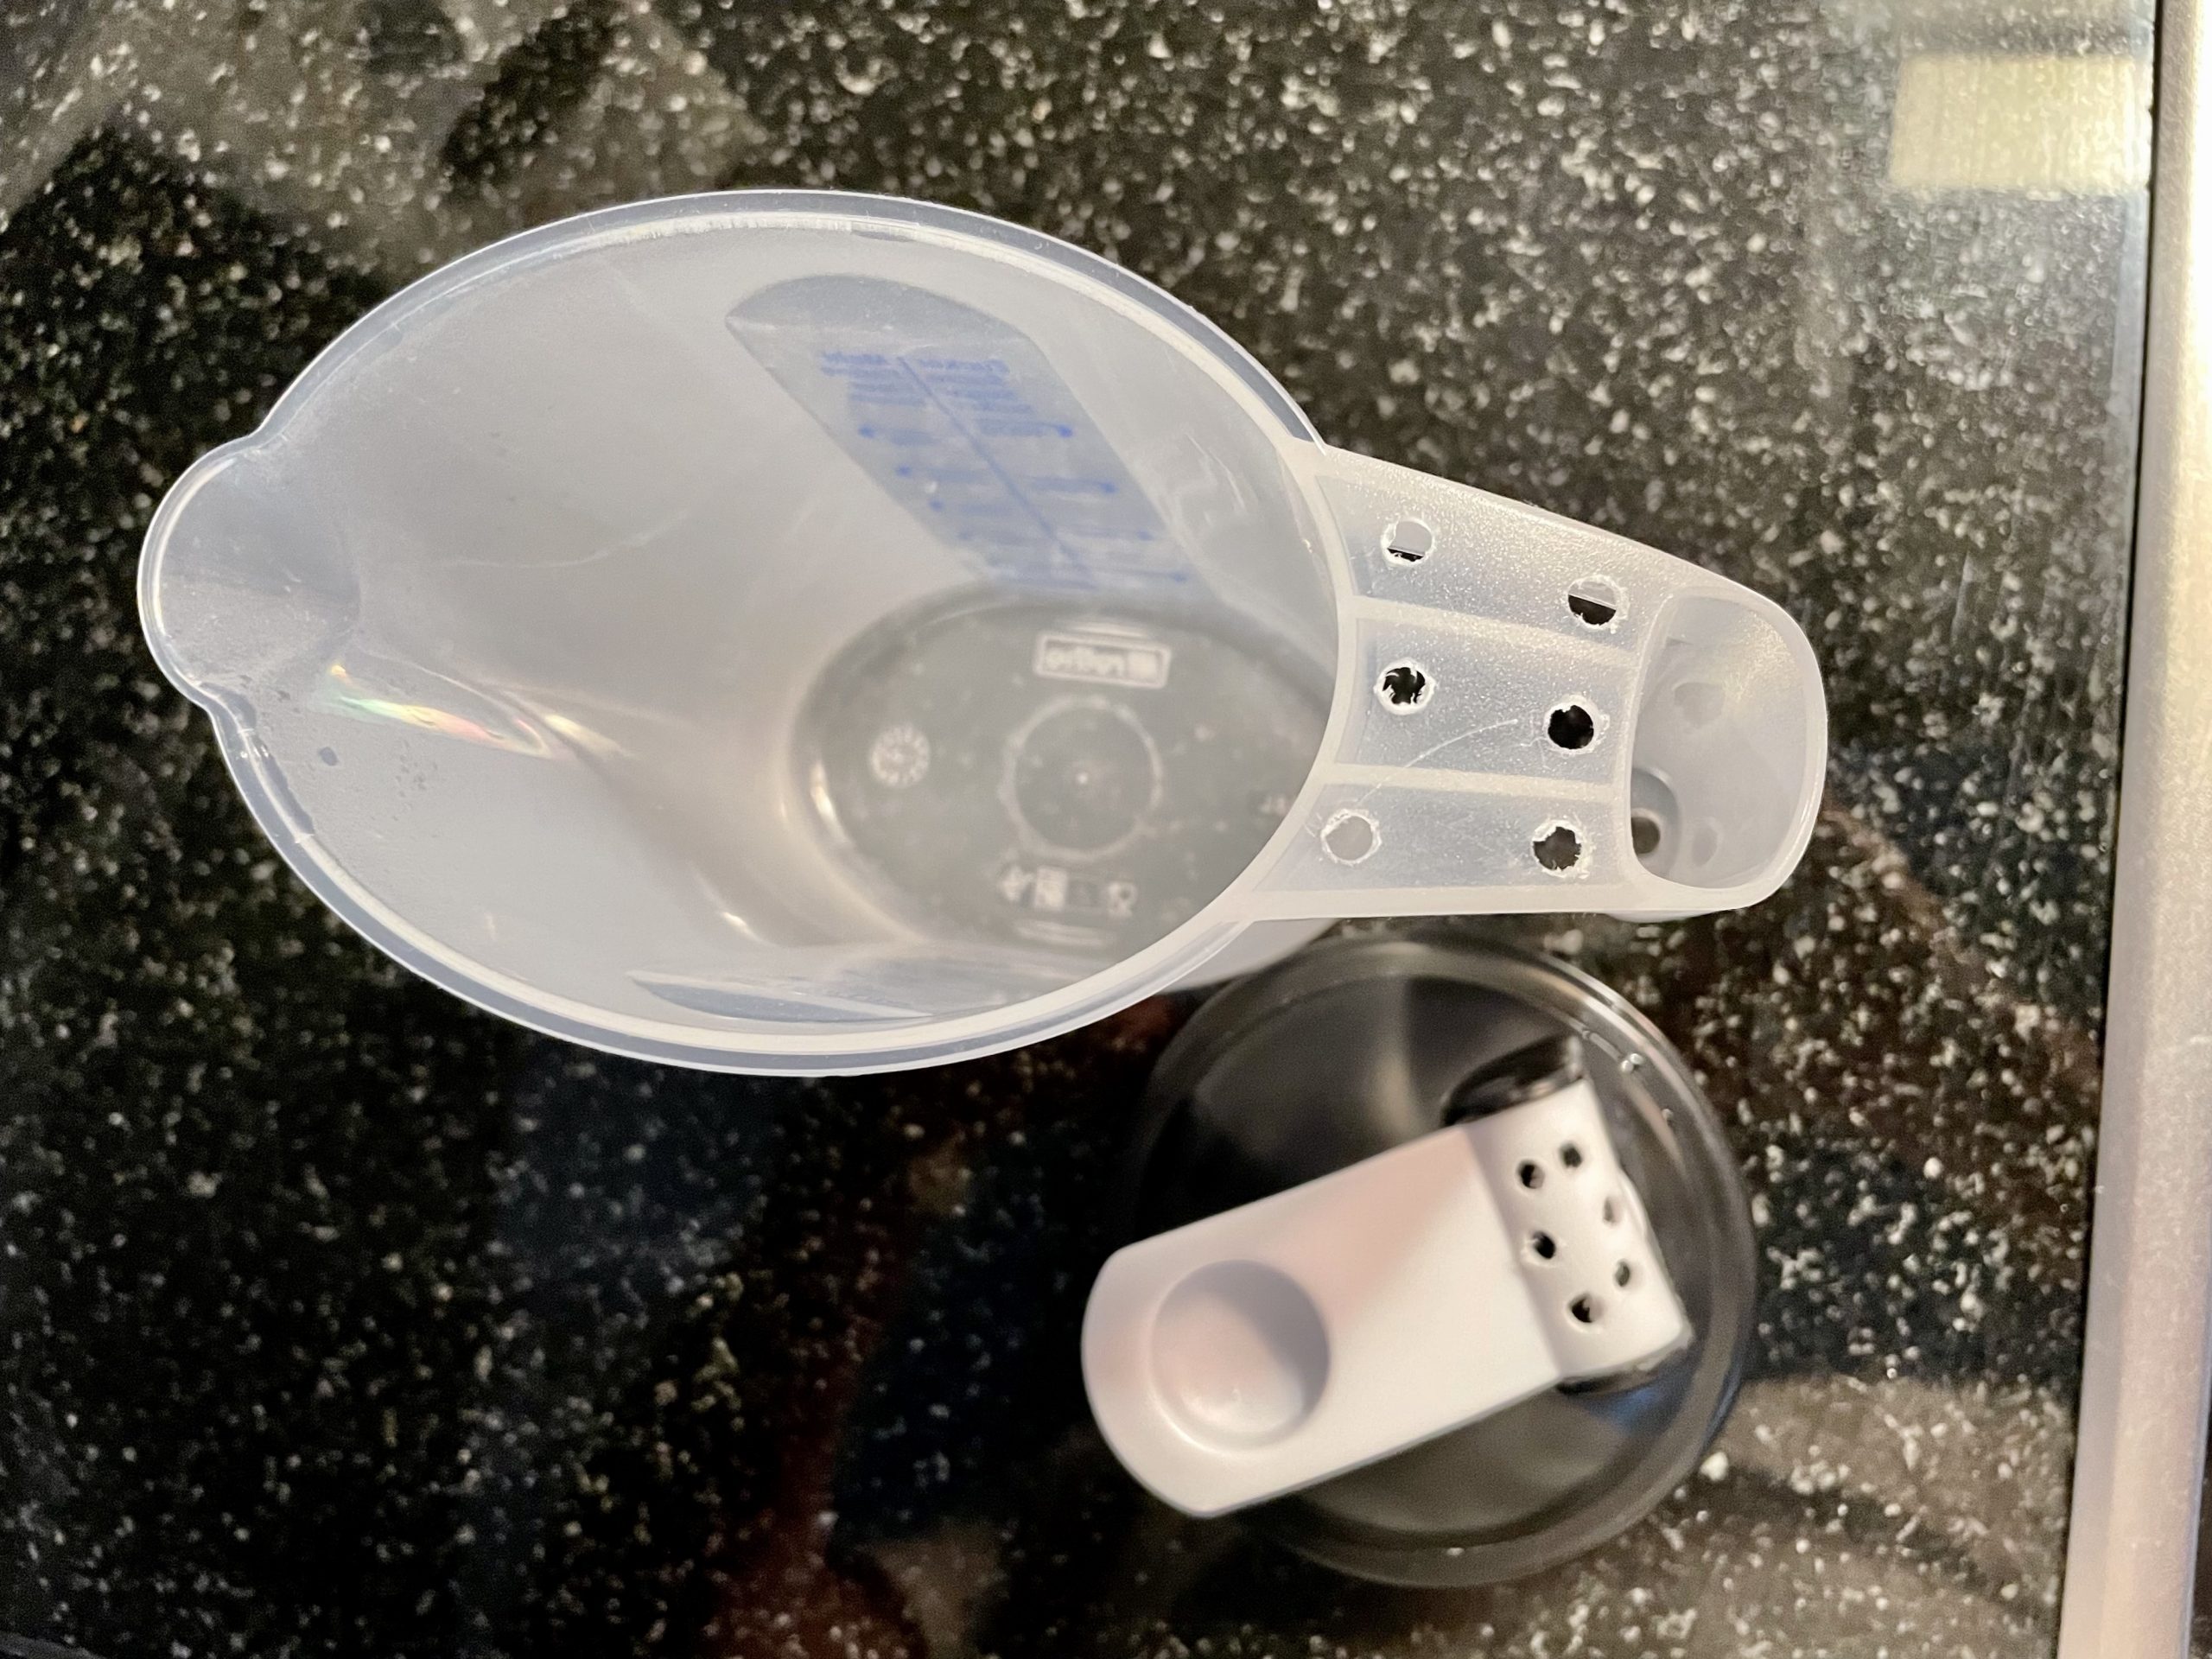
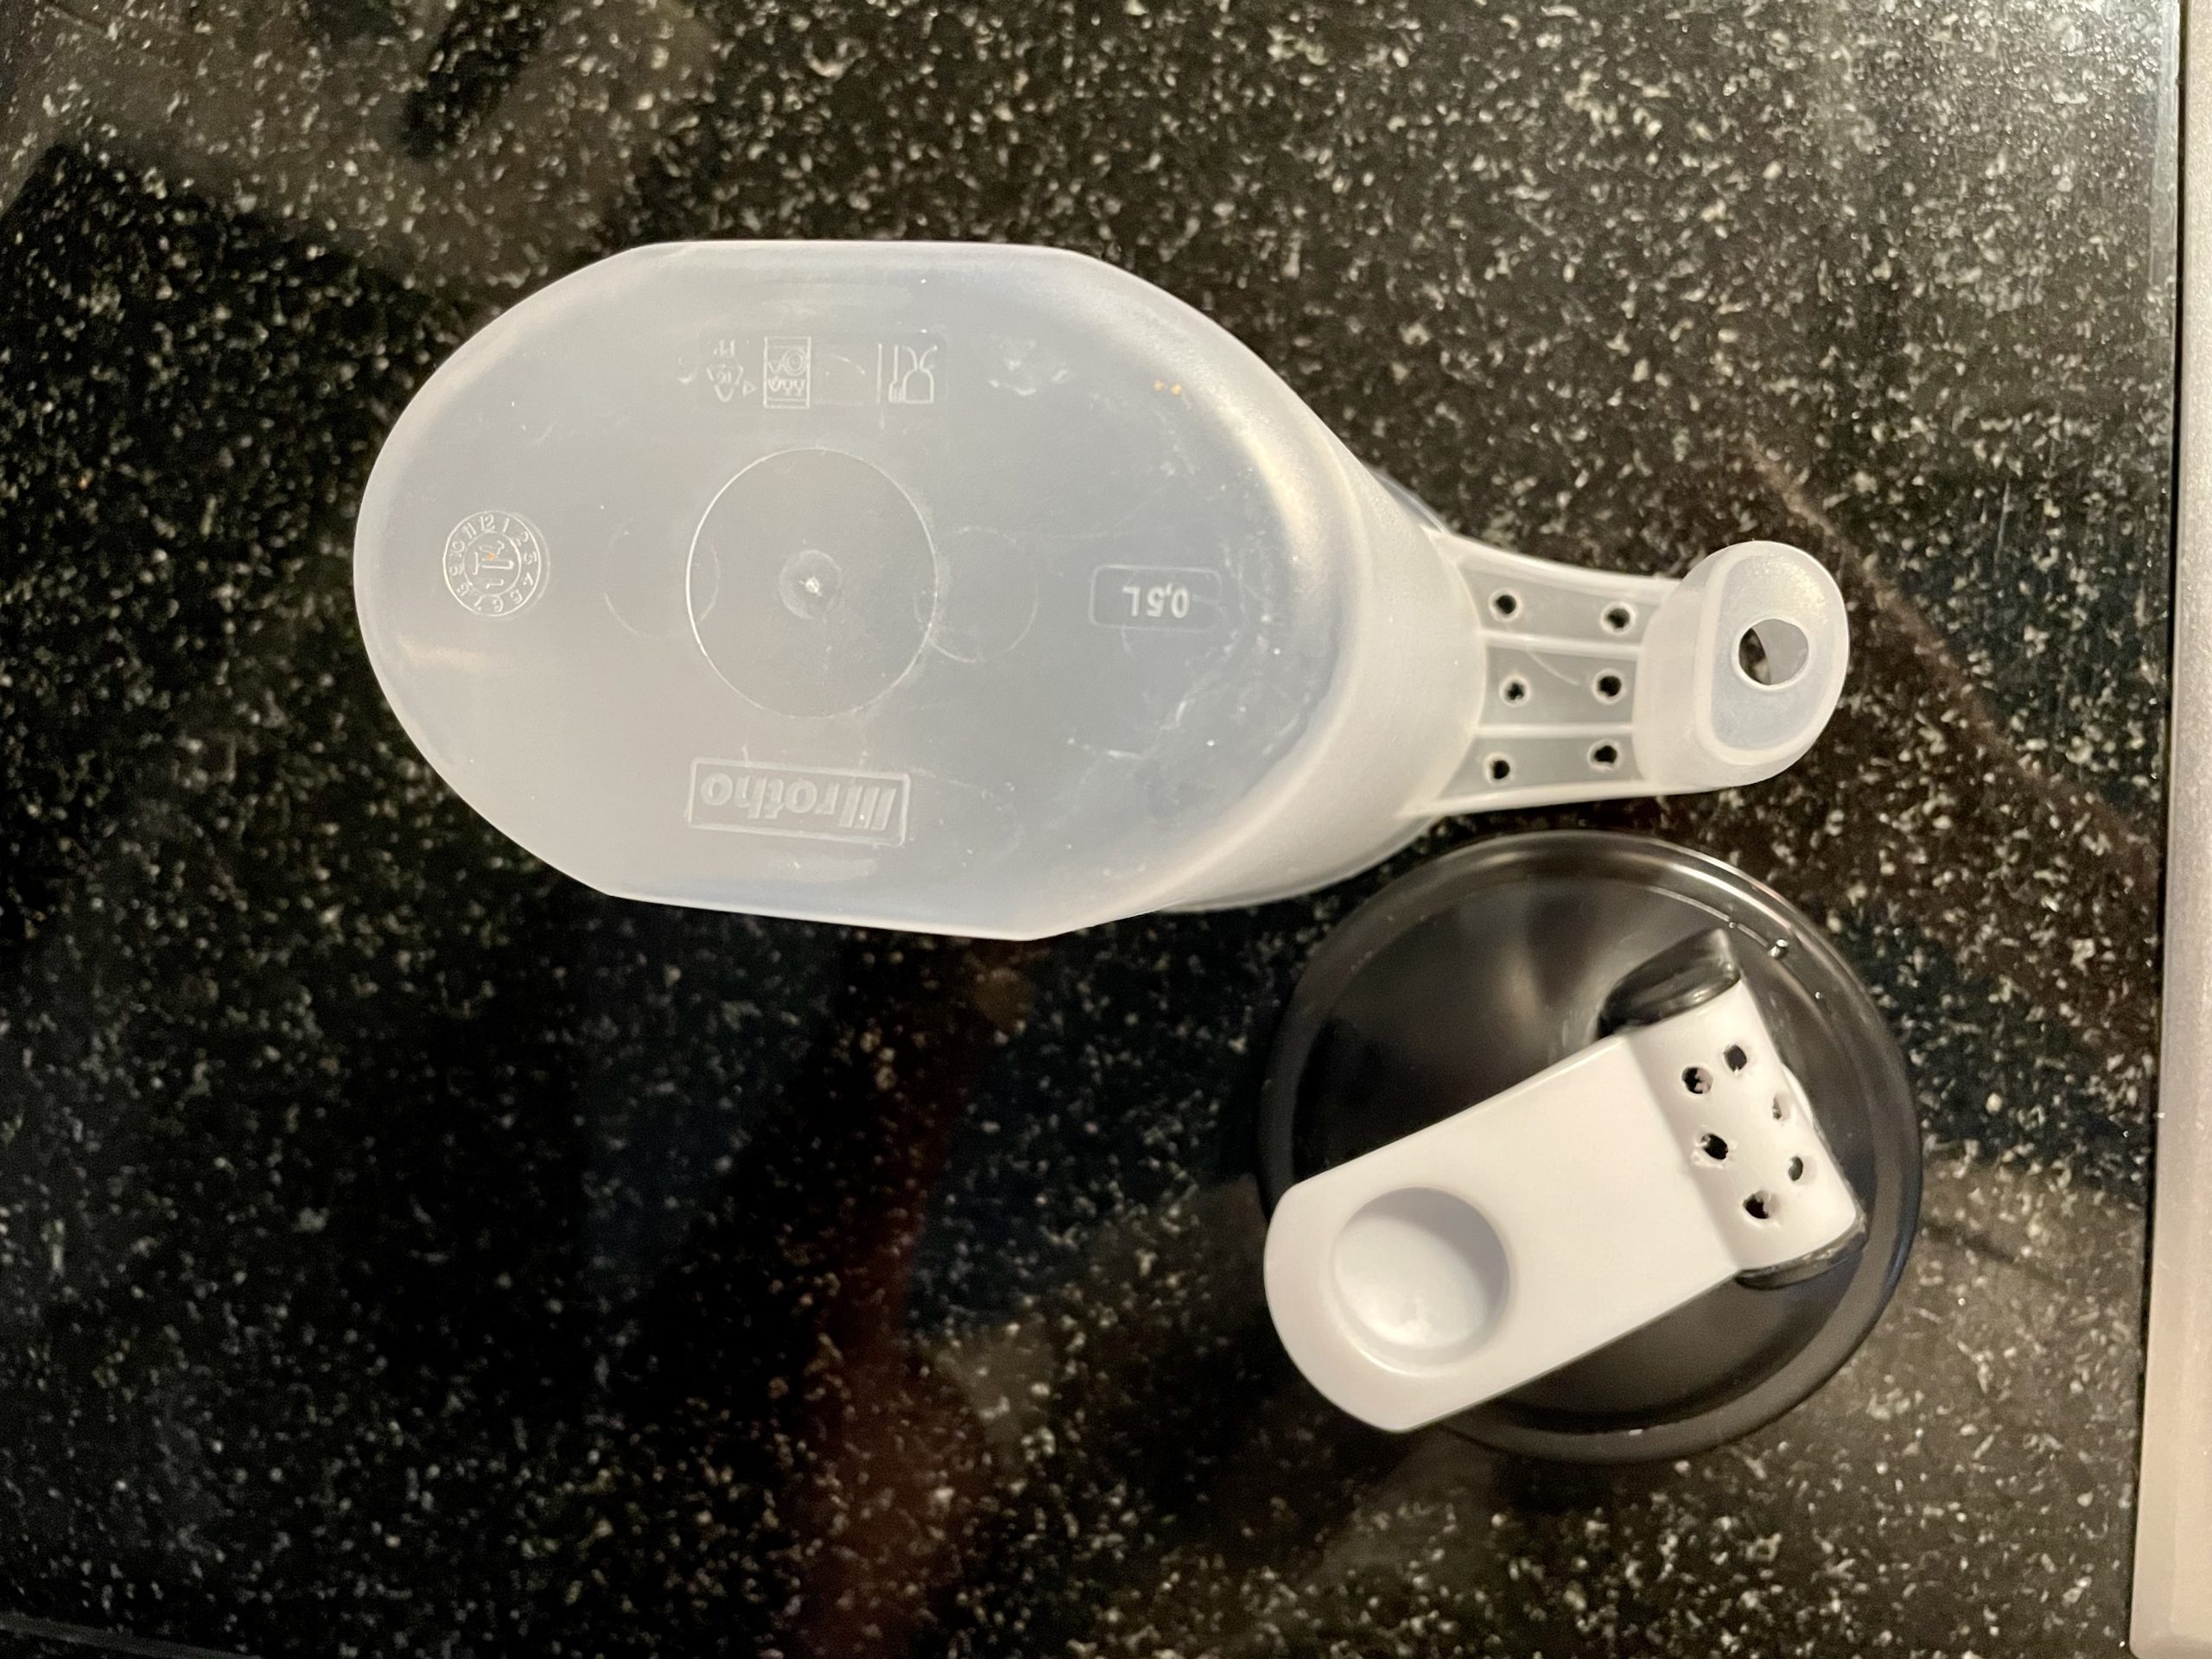
The actual fix, if you already have faulty products

Example of two quick-fixed “dishwasher safe” products, the above mug and the lid of a shaker (both before final cleaning of splinters). Also note that these fixes have no significant negative impacts on the structural stability, reliability and durability of the products:

Other faulty “dishwasher friendly” products

Unfortunately, there are countless other examples!
Check the bases of your coffee cups: Are they fully flat? Or rather slightly concave, as so often? If the later, are there any slits/gaps in the base so that dishwater can nicely drain when placing the cups in the dishwasher upside-down?
Similar: Bowls, glasses, plates
I haven’t tried fixing those myself yet, but milling slits/gaps with a multifunction rotary tool (e.g. Dremel) might be worth trying.

Solution: HP OMEN 30L GT13 Desktop/Gaming PC does not boot anymore (CMOS reset, BIOS update, Omen logo, Windows, boot loop)

Symptom:

  • After switching on your HP Omen Desktop/Gaming PC, the boot process gets stuck at the “Omen” logo and Windows (the default OS) doesn’t get started anymore.
  • Power supply, LED lights, mainboard, RAM, GPU, hard disk and SSD are working and there’s no indication that anything would be wrong with them (IOW: The PC per se isn’t dead and seems to work).
  • The last time you used your PC, you might (or might not) have been prompted by an HP app (maybe the “HP Gaming Hub” or similar) to update some drivers or the firmware.

Reason/root cause:

HP apps apparently tend to mess with the CMOS and BIOS (e.g. automatically install updates), which may cause the HP Omen to get stuck the next time you try booting it.
Windows 10 would thus no longer start.

Solution:

Reset the PC’s CMOS.

How to reset the CMOS in a HP Omen 30L:

  1. Turn off the computer
    I.e. hold the power button for a couple of seconds until lights go out. For double safety, you could even quickly disconnect and reconnect the power cable.
  2. On your keyboard, press and hold the Windows + V keys
    To rule out any other problem, it’s best to plug your original HP USB keyboard into a USB plug directly on the PC.
  3. Still pressing those two keys, press and hold the Power button on the computer for roughly 1 second, then release the power button, but continue pressing and holding the Windows + V keys, until you see that the PC boots and doesn’t get stuck at the “Omen” logo again, instead, there might be notifications that further updates are being installed. Or you might get displayed a CMOS reset screen or hear beeping sounds.
    Note: According to HP, one has to press the power button 2-3 seconds in this step to trigger a CMOS reset. For my HP OMEN 30L GT13, that was apparently too long however, as it shut down the PC instead. Just try it a couple of times, until you finally see something happening again on the boot screen (but do not interrupt ongoing updates!).
  4. If there’s a message that there are pending updates, wait for them to finish.
    If you see a message that the CMOS was reset, hit ENTER to reboot the PC

Credits:

https://h30434.www3.hp.com/t5/Gaming-Desktops/Omen-30L-GT13-boot-loop-after-bios-update/td-p/8056991

Some more useful tricks about the HP Omen 30L GT13

Even though booting stopped at the Omen logo, I was still able to enter the BIOS setup upon rebooting. To enter the BIOS setup, do the following:

  1. Press and hold the F10 key on your keyboard (on the original HP USB keyboard, you’ll actually have to press the “Fn” key and the “F10” key at the same time, as F10 is a secondary functionality only)
  2. Press and hold the power button for 3 seconds till the PC turns off, then hit the power button again to start the PC while you’re holding the F10 key (Fn + F10)

First, as I was indeed suspecting that something might have gone wrong with an accidental (or intransparent) BIOS update, I tried following a hint that if one disconnects the hard drive (and/or SSD?), the mainboard of an HP Omen would allegedly automatically fall back to the previous BIOS version.
Therefore, I tried to disconnect the HDD and start my PC like that. It didn’t have any positive effect though, as the boot process kept getting stuck at the Omen logo.

BTW, to open the HP Omen 30L case, you simply press the big “INTERNAL ACCESS” button in the upper right corner of the back side of the PC, then tilt the (plexi-)glass window, then tilt it back towards the case a bit and lift the window up and off.

A further complication in my case was that I also use a fairly new and cutting edge Samsung 49″ super wide screen monitor (Samsung LC49RG90SSUXEN, supporting natively 5120×1440 pixels at a 120 Hz refresh rate) for that PC (and sometimes also with my MacBook Pro, via a special 8k USB-C to DisplayPort 1.4 cable).
My experiences with any sort of Samsung devices have been a mixed bag so far, so for one, I don’t really trust the quality of Samsung’s hardware, firmware or software (although I can’t complain about this display, it has been all fine so far and I’d highly recommend it for simulators). Secondly, I’ve plugged some essential USB devices (like the original HP USB keyboard and the receiver of my beloved Logitech G305 mouse) directly to the display’s USB hub, rather than to the PC itself. To rule out any weird error (e.g. like a boot process stopping because of a missing keyboard, caused by a faulty USB hub or connection), I’d generally recommend disconnecting “exotic” devices (like steering wheels, web cams, joysticks, controllers, ..) that could potentially cause troubles and plugin the essential devices (keyboard, mainly, maybe also the mouse) directly to the PC.

Solution: Apple Thunderbolt Display brightness control doesn’t work anymore

Apparently, there’s a macOS bug that if your Mac has been connected to a Thunderbolt Display for a long time, the brightness of the display can no longer be adjusted (neither by pressing the according F1/F2 keys on your keyboard nor by using the brightness slider in the display settings of the system preferences).

The simple yet surprising fix is:

  1. Unplug your Thunderbolt Display’s Thunderbolt cable, and plug it in again
  2. The display’s brightness will be adjustable again


(credits: https://forums.macrumors.com/threads/thunderbolt-brightness-control-settings-gone.1254406/)

GitLab 10.5 and later: Solution for error “Validation failed for domain” with Let’s Encrypt

GitLab 10.5 introduced built-in support for Let’s Encrypt.

Unfortunately, if you follow the official GitLab instructions how to enable Let’s Encrypt support, you may encounter the following error when rebuilding GitLab:

Running handlers:
There was an error running gitlab-ctl reconfigure:

letsencrypt_certificate[yourhost.yourdomain.com] (letsencrypt::http_authorization line 3) had an error: RuntimeError: acme_certificate[staging] (/opt/gitlab/embedded/cookbooks/cache/cookbooks/letsencrypt/resources/certificate.rb line 20) had an error: RuntimeError: [yourhost.yourdomain.com] Validation failed for domain yourhost.yourdomain.com

Running handlers complete
Chef Client failed. 11 resources updated in 11 seconds

Warnings:

Let’s Encrypt is enabled, but external_url is using http

The last line is rather misleading, as the domain validation can apparently also fail if one sets  external_url = “https://yourhost.yourdomain.com”

As a workaround, add the following two additional lines to /etc/gitlab/gitlab.rb (hat tip to Kai Mindermann and Thomas Jost for the hints):

nginx['redirect_http_to_https_port'] = 80
nginx['redirect_http_to_https'] = true


So, all in all, you need to set in /etc/gitlab/gitlab.rb:

external_url 'https://yourhost.yourdomain.com'

and add the following lines (adjust the notification e-mail address):

letsencrypt['enable'] = true
letsencrypt['contact_emails'] = ['gitlab-notifications@yourdomain.com'] # optional
nginx['redirect_http_to_https_port'] = 80
nginx['redirect_http_to_https'] = true

Make sure that your firewall doesn’t block access to ports 22 (SSH), 80 (HTTP), 443 (HTTPS).

After that, reconfigure GitLab (in a shell):

# gitlab-ctl reconfigure

That’s it! You can now register/login at https://yourhost.yourdomain.com.

Solution for: Proxmox backup error due to iothread=1

If you see the following error when trying to backup a KVM VM image on Proxmox:

ERROR: Backup of VM 100 failed – disk ‘scsi0’ ‘zfsvols:vm-100-disk-1’ (iothread=on) can’t use backup feature currently. Please set backup=no for this drive at /usr/share/perl5/PVE/VZDump/QemuServer.pm line 77. INFO: Backup job finished with errors TASK ERROR: job errors

edit /etc/pve/qemu-server/100.conf, look for a line similar to

scsi0: zfsvols:vm-100-disk-1,iothread=1,size=70G

and change it to

scsi0: zfsvols:vm-100-disk-1,iothread=0,size=70G

Afterwards, it’s possible to backup the VM.

Wi-Fi troubles with a B&W Zeppelin Air and AirPort Extreme/AirPort Time Capsule?

Recently, my B&W Zeppelin Air speakers have started to show a weird problem: I managed to stream music via AirPlay to them, but they would only play the music for a few seconds, then stop for a seemingly random amount of time, then play the music for a second or so again, then stop again, and so on. A lengthy stuttering, so to say.

Turns out, the reason for these troubles was that I set the AirPort Time Capsule’s main SSID wireless security to “WPA2 Personal” and the guest SSID’s wireless security to “WPA/WPA2 Personal”. Now I’ve set them both to “WPA/WPA2 Personal” and the Zeppelin Air works great again! Streaming also works fine if both “networks” are set to “WPA2 Personal” (which is a somewhat safer setting than WPA/WPA2 mixed mode, some old Wi-Fi cards might not work anymore, however).

I can’t quite explain this, based on the observed symptoms (one would expect things to either work or not work, but not half-way). It seems the AirPort Extreme/Time Capsule has troubles using different wireless security protocols for the main network and the guest network. This might also partly explain the generally shaky Wi-Fi connectivity I’ve experienced since upgrading my Macs to Yosemite – the random Wi-Fi connectivity drops even kept occurring in 10.10.2. I’ll keep an eye on it.


HP 48G: How to fix the “Warning: Invalid Card Data” problem

Recently, my good old HP 48G calculator (one of the best calculators ever built and my longtime personal favourite till today) started displaying the following message whenever I switched it on:

Warning: Invalid Card Data

Which seems a bit odd at first, considering the 48G model has no card slot (only the 48GX model has one). Luckily, there’s a simple solution: Execute the PINIT command by typing “PINIT” (without the double quotes) and pressing the ENTER key.

There’s a great, detailed explanation of this problem and the according fix in the “invalid card data at my hp48g” thread over at the independent HP calculator museum. If this warning message appears on a HP 48GX and the problem persists after applying this fix, take a look at step 3 described in the  article titled “Message, Invalid Card Data, is Displayed when the Calculator is Turned On” on HP’s support forum.

Wouldn’t it be a pity if a company with such a great history and so many great hardware products ceased to be a hardware company?