The “Operation not permitted” error message is caused by one of the typical annoyancesfeatures in macOS, namely the Terminal app lacking “full disk access” by default (and by design).
This conclusion unfortunately isn’t obvious, as when encountering the above error message, one would typically first check the ownerships and permissions of the directory/file/symlink “causing” the error, then perhaps the ACL / extended attributes, then whether the resource might still be locked by another process accessing it, and last but not least, one would remember macOS’s SIP (System Integrity Protection) and even consider booting into recovery mode. But none of that is actually required. The solution is:
In the macOS “System Settings”, go to “Privacy & Security”
Then click on “Full Disk Access” and enable it for “Terminal” (slider turns blue)
Open a new Terminal window/session
Irritatingly, upgrading to macOS Ventura apparently resets the Terminal app’s security privileges.
Example:
I wanted to remove and recreate a symlink, so that “MobileSync” (where macOS stores backups of iOS devices like iPhones, iPads) isn’t just a regular, local directory, but a symlink pointing to a directory on a mounted NAS share. Advantage: Backups of iOS devices don’t use up valuable (and expensive) SSD storage space on your MacBook Air/Pro, but use cheap NAS storage instead (further, you don’t create duplicate backups on each of your Macs). Here’s where the MobileSync symlink is located and where it points to, in my case (you can create it using ‘ln -s /Volumes/backups_ios/MobileSync .‘, my share is named ‘backup_ios‘)
mymac ~/Library/Application Support $ ls -lad ~/Library/Application\ Support/MobileSync
lrwxr-xr-x 1 myuser staff 31 Apr  1 00:47 '/Users/myuser/Library/Application Support/MobileSync' -> /Volumes/backups_ios/MobileSync
Even as root, I first couldn’t remove the symlink I created some time back before the upgrade to Ventura. Which is even the more puzzling considering this all happens in a regular user’s home directory.
Got a “dishwasher safe” product whose shape is actually not suitable for a dishwasher at all? You’re not alone.
In fact, it’s shocking how many allegedly dishwasher friendly products out there obviously weren’t optimised for dishwashers, shape-wise.
Considering that in a free market, supply would ultimately be driven by demand, i.e. our purchases, one can “guesstimate” how little time and thought most people (yours truly too) apparently spend for purchasing decisions related to such everyday products! Then again, at least the engineers designing those products must have spent a couple of days thinking through their designs, one would hope. How could they end up with such inadequate designs, and how could those even pass internal product testing and quality assurance assessments? It’s probably due to market imperfections indeed.
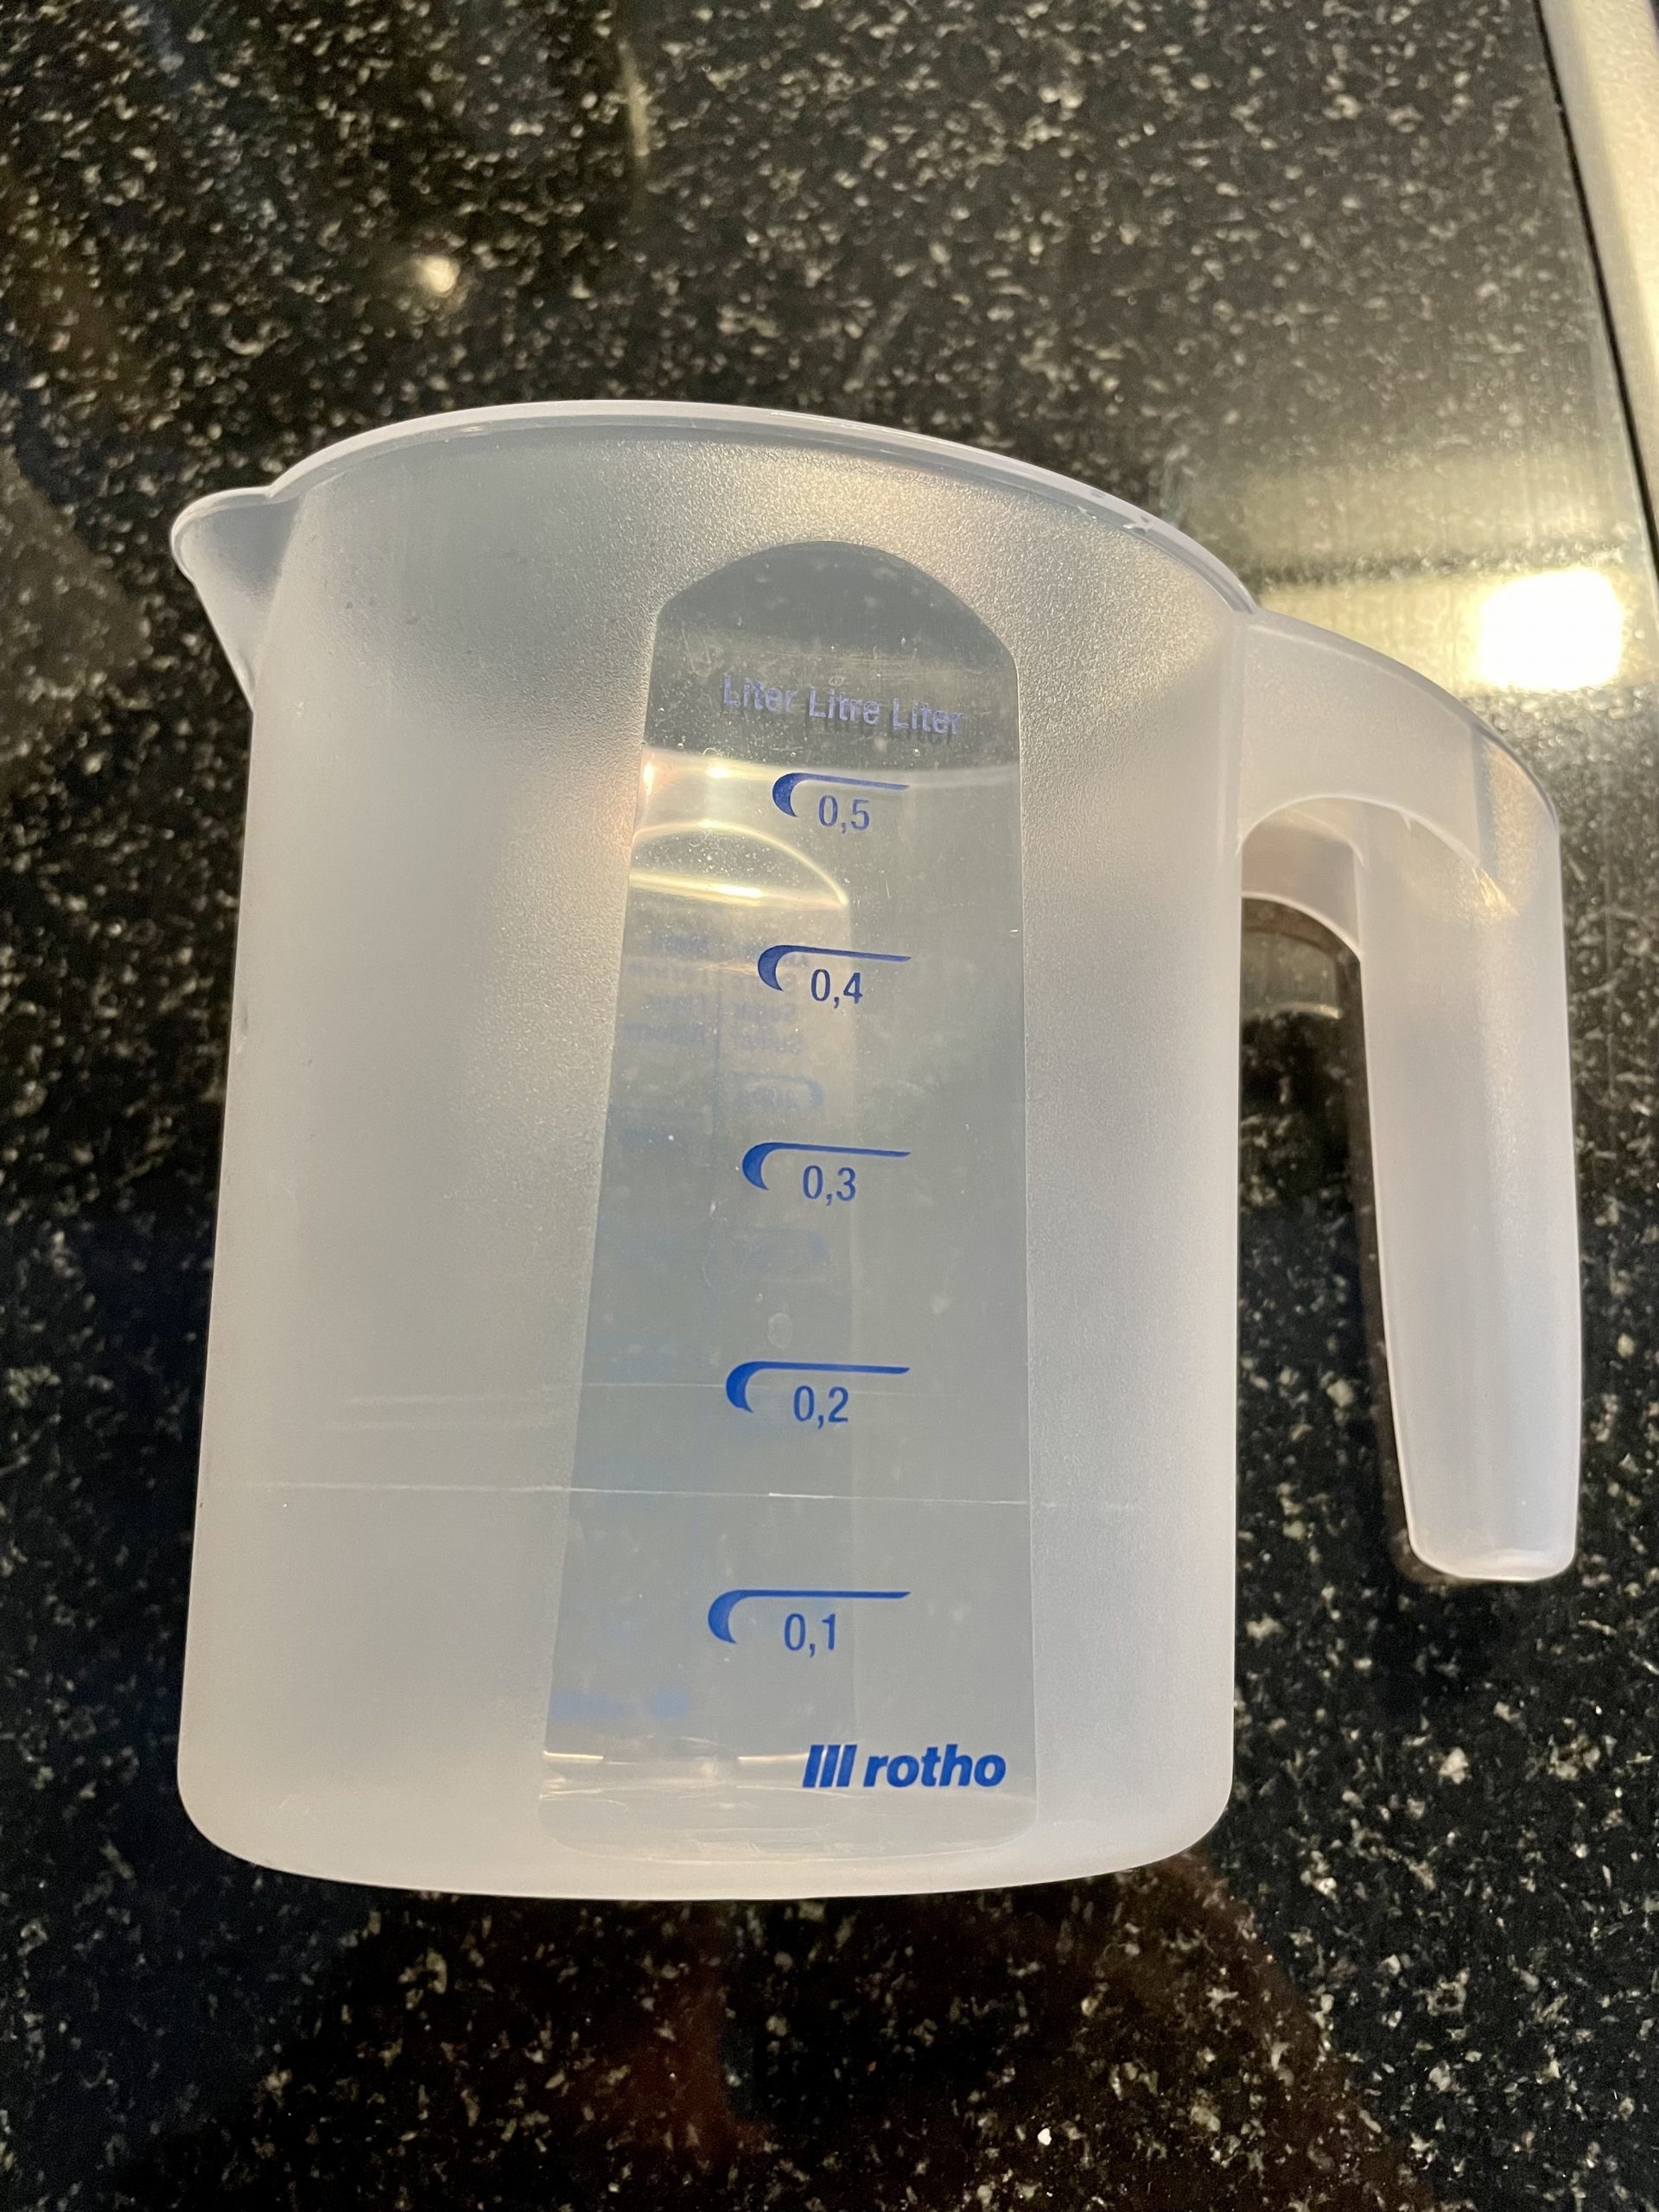
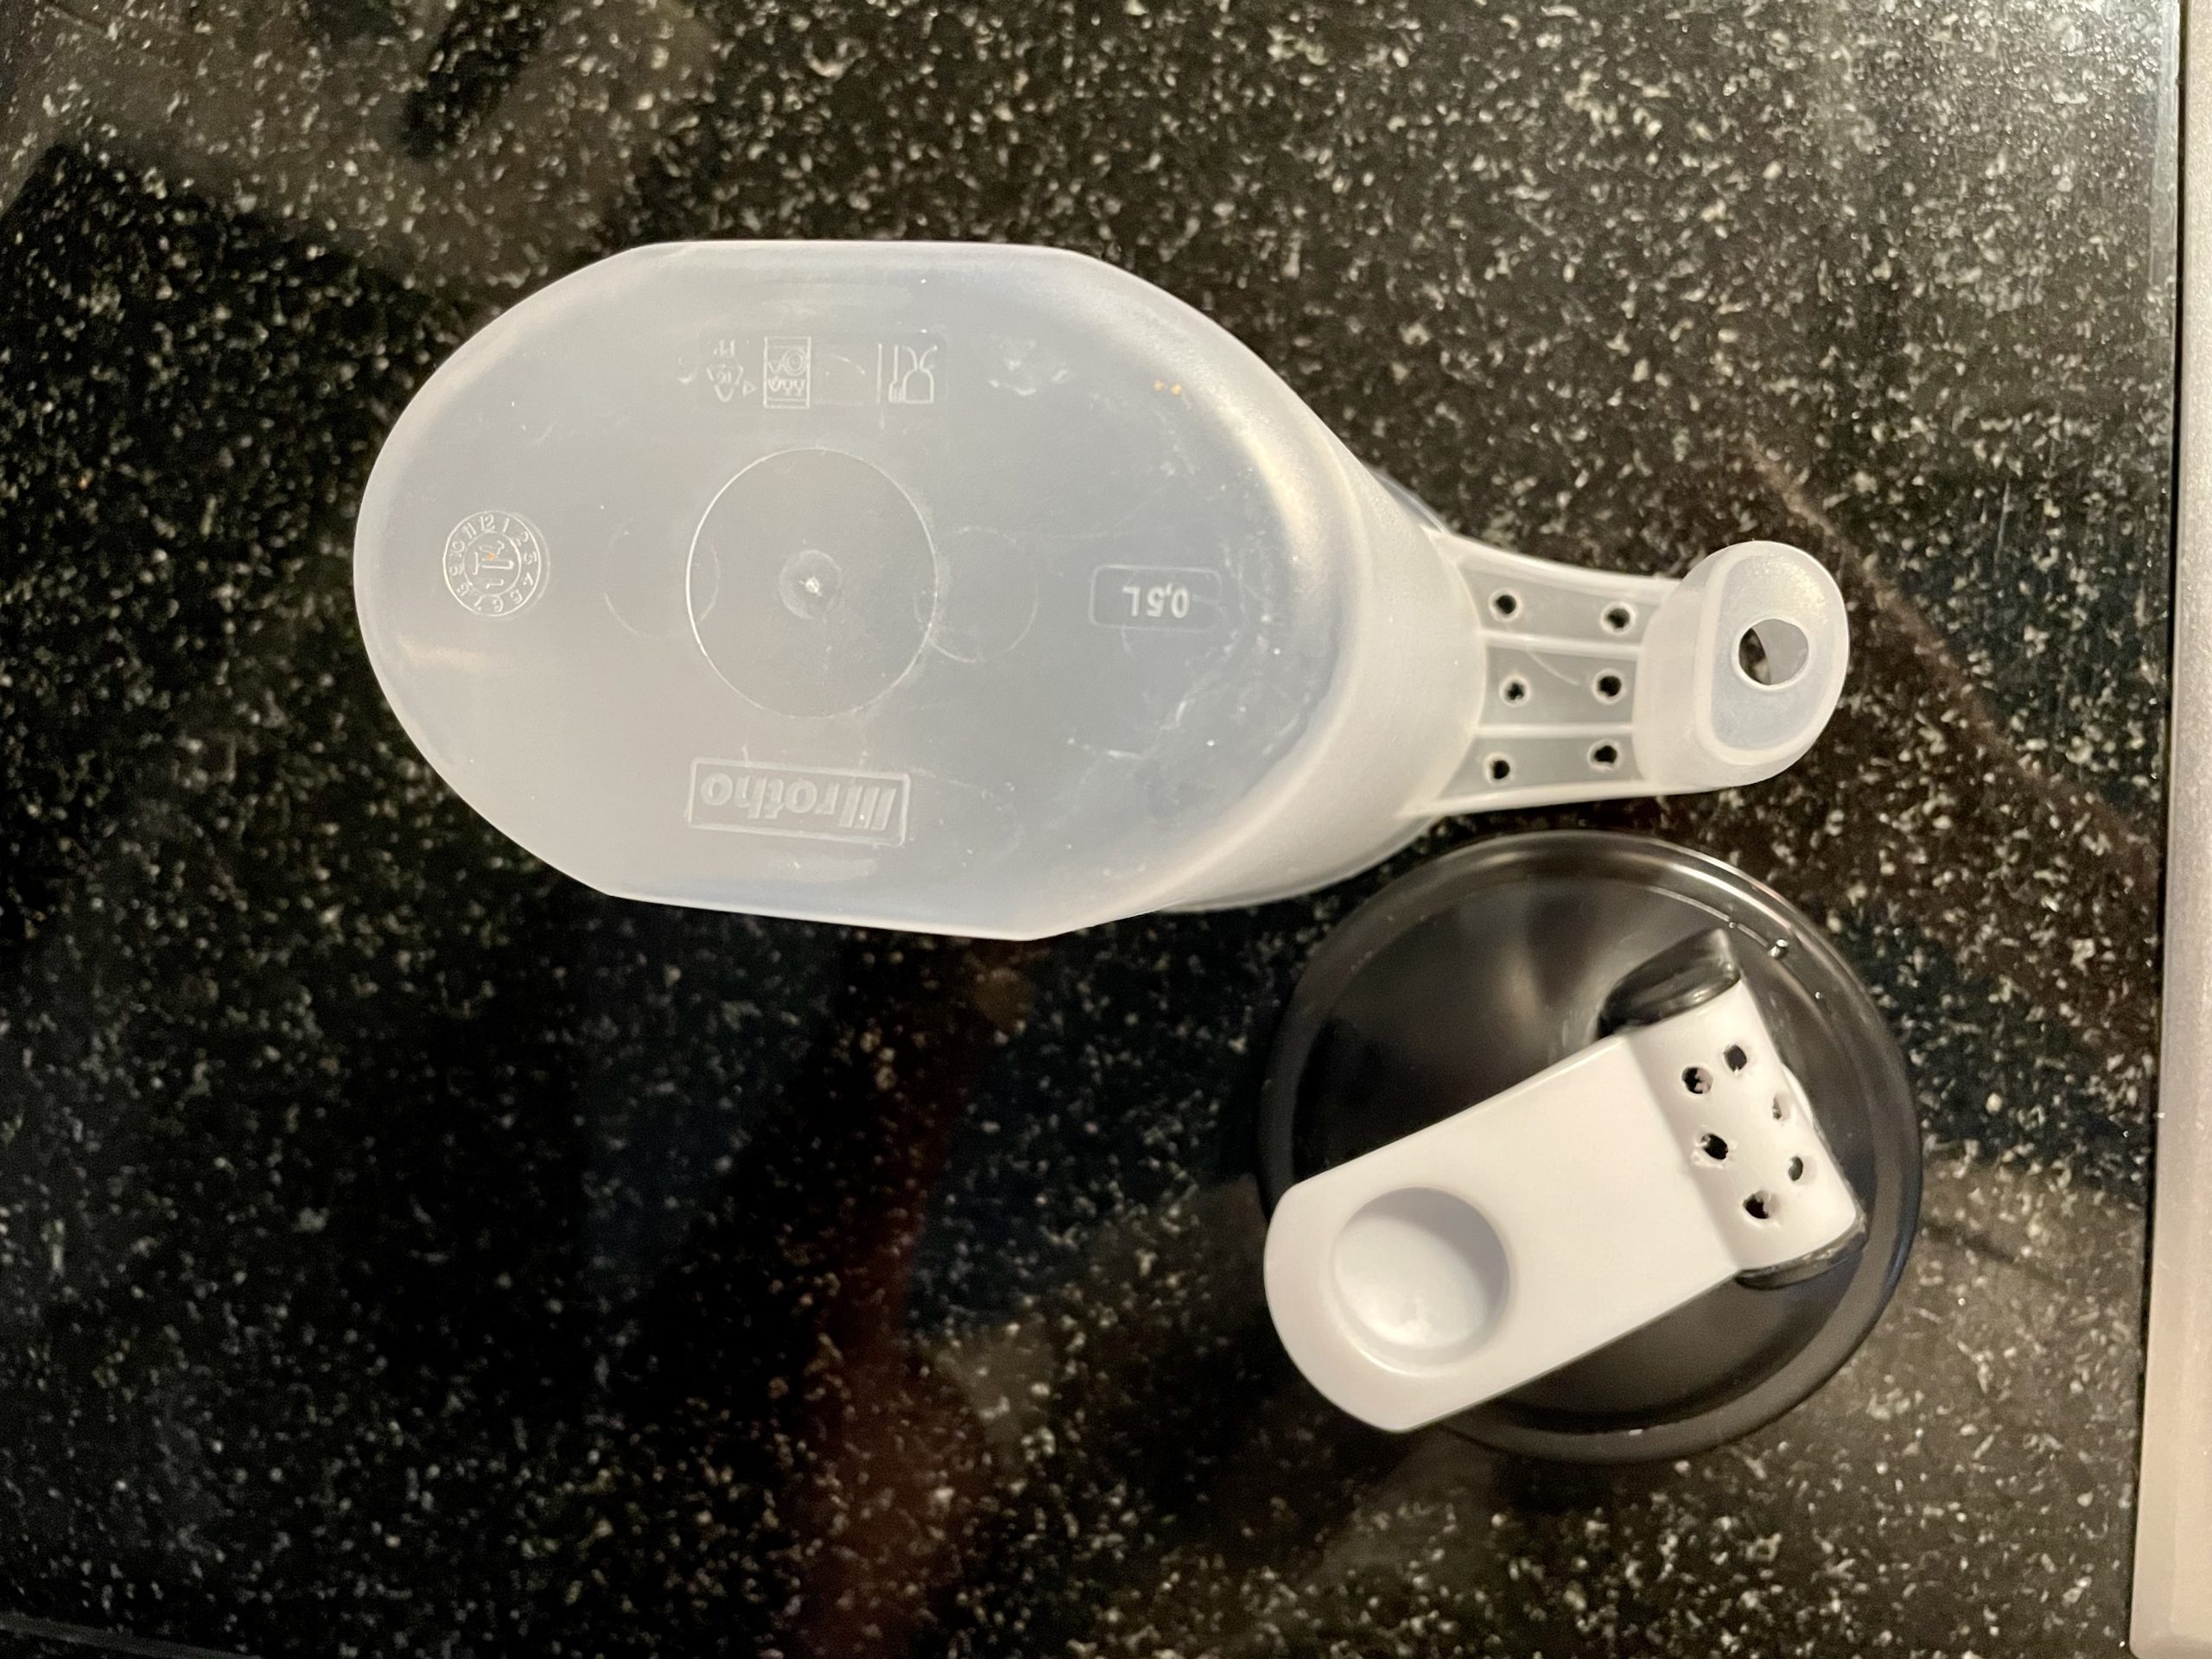
E.g. look at this inconspicuous, allegedly officially “dishwasher safe” plastic mug:
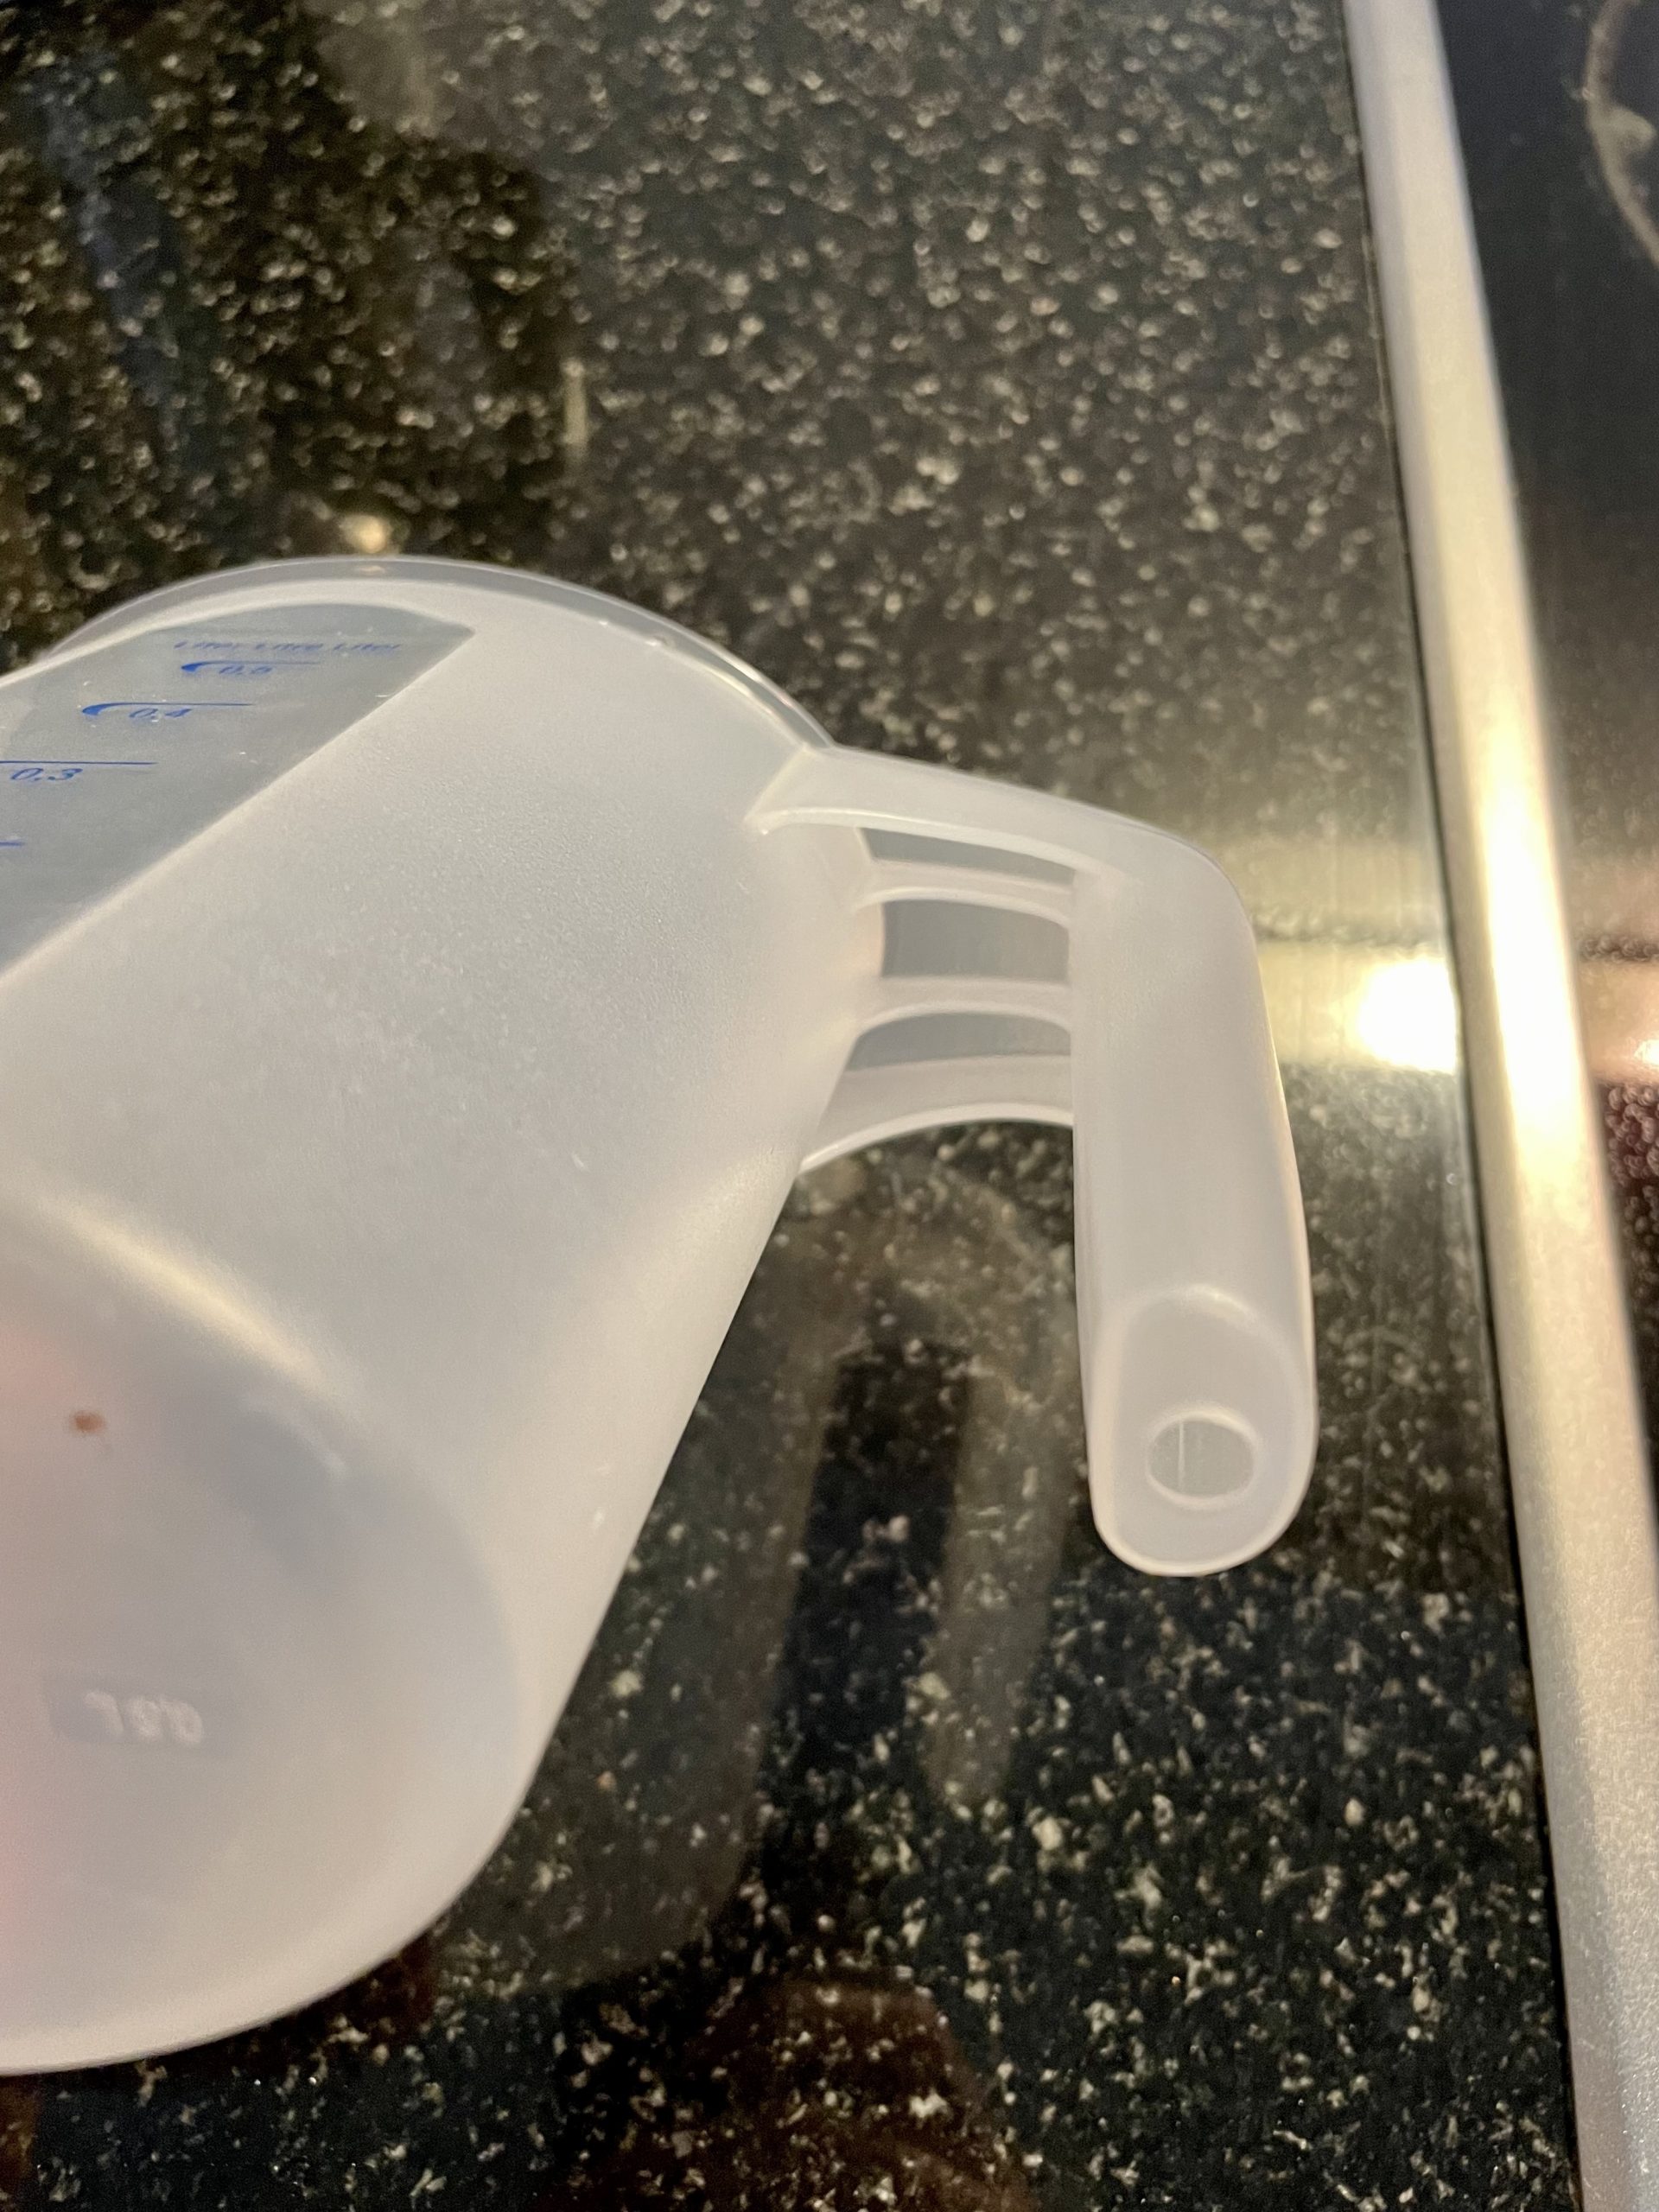
As you can see: Its designer DID think of making a drainage hole at the bottom of the hollow handle. Dishwater would thus drain from it and not collect.
But what’s the point of that hole anyway, if water can’t and isn’t supposed to drain from the mug? As a mug, by design, is not supposed to leak liquids. In other words: Who on earth would place this mug in the dishwasher in upright position, for dishwater to collect in the mug itself? So, the only reasonable way to put this mug into the dishwasher would be upside-down. Which voids the whole point for that drainage hole in the hollow handle, except maybe to release hot steam, lowering the maximum heat the plastic handle would have to withstand (but what about the ascending hot steam that will be collected in the mug itself? Heat-deforming the bottom of the mug would be even worse than heat-deforming the bottom of the handle)
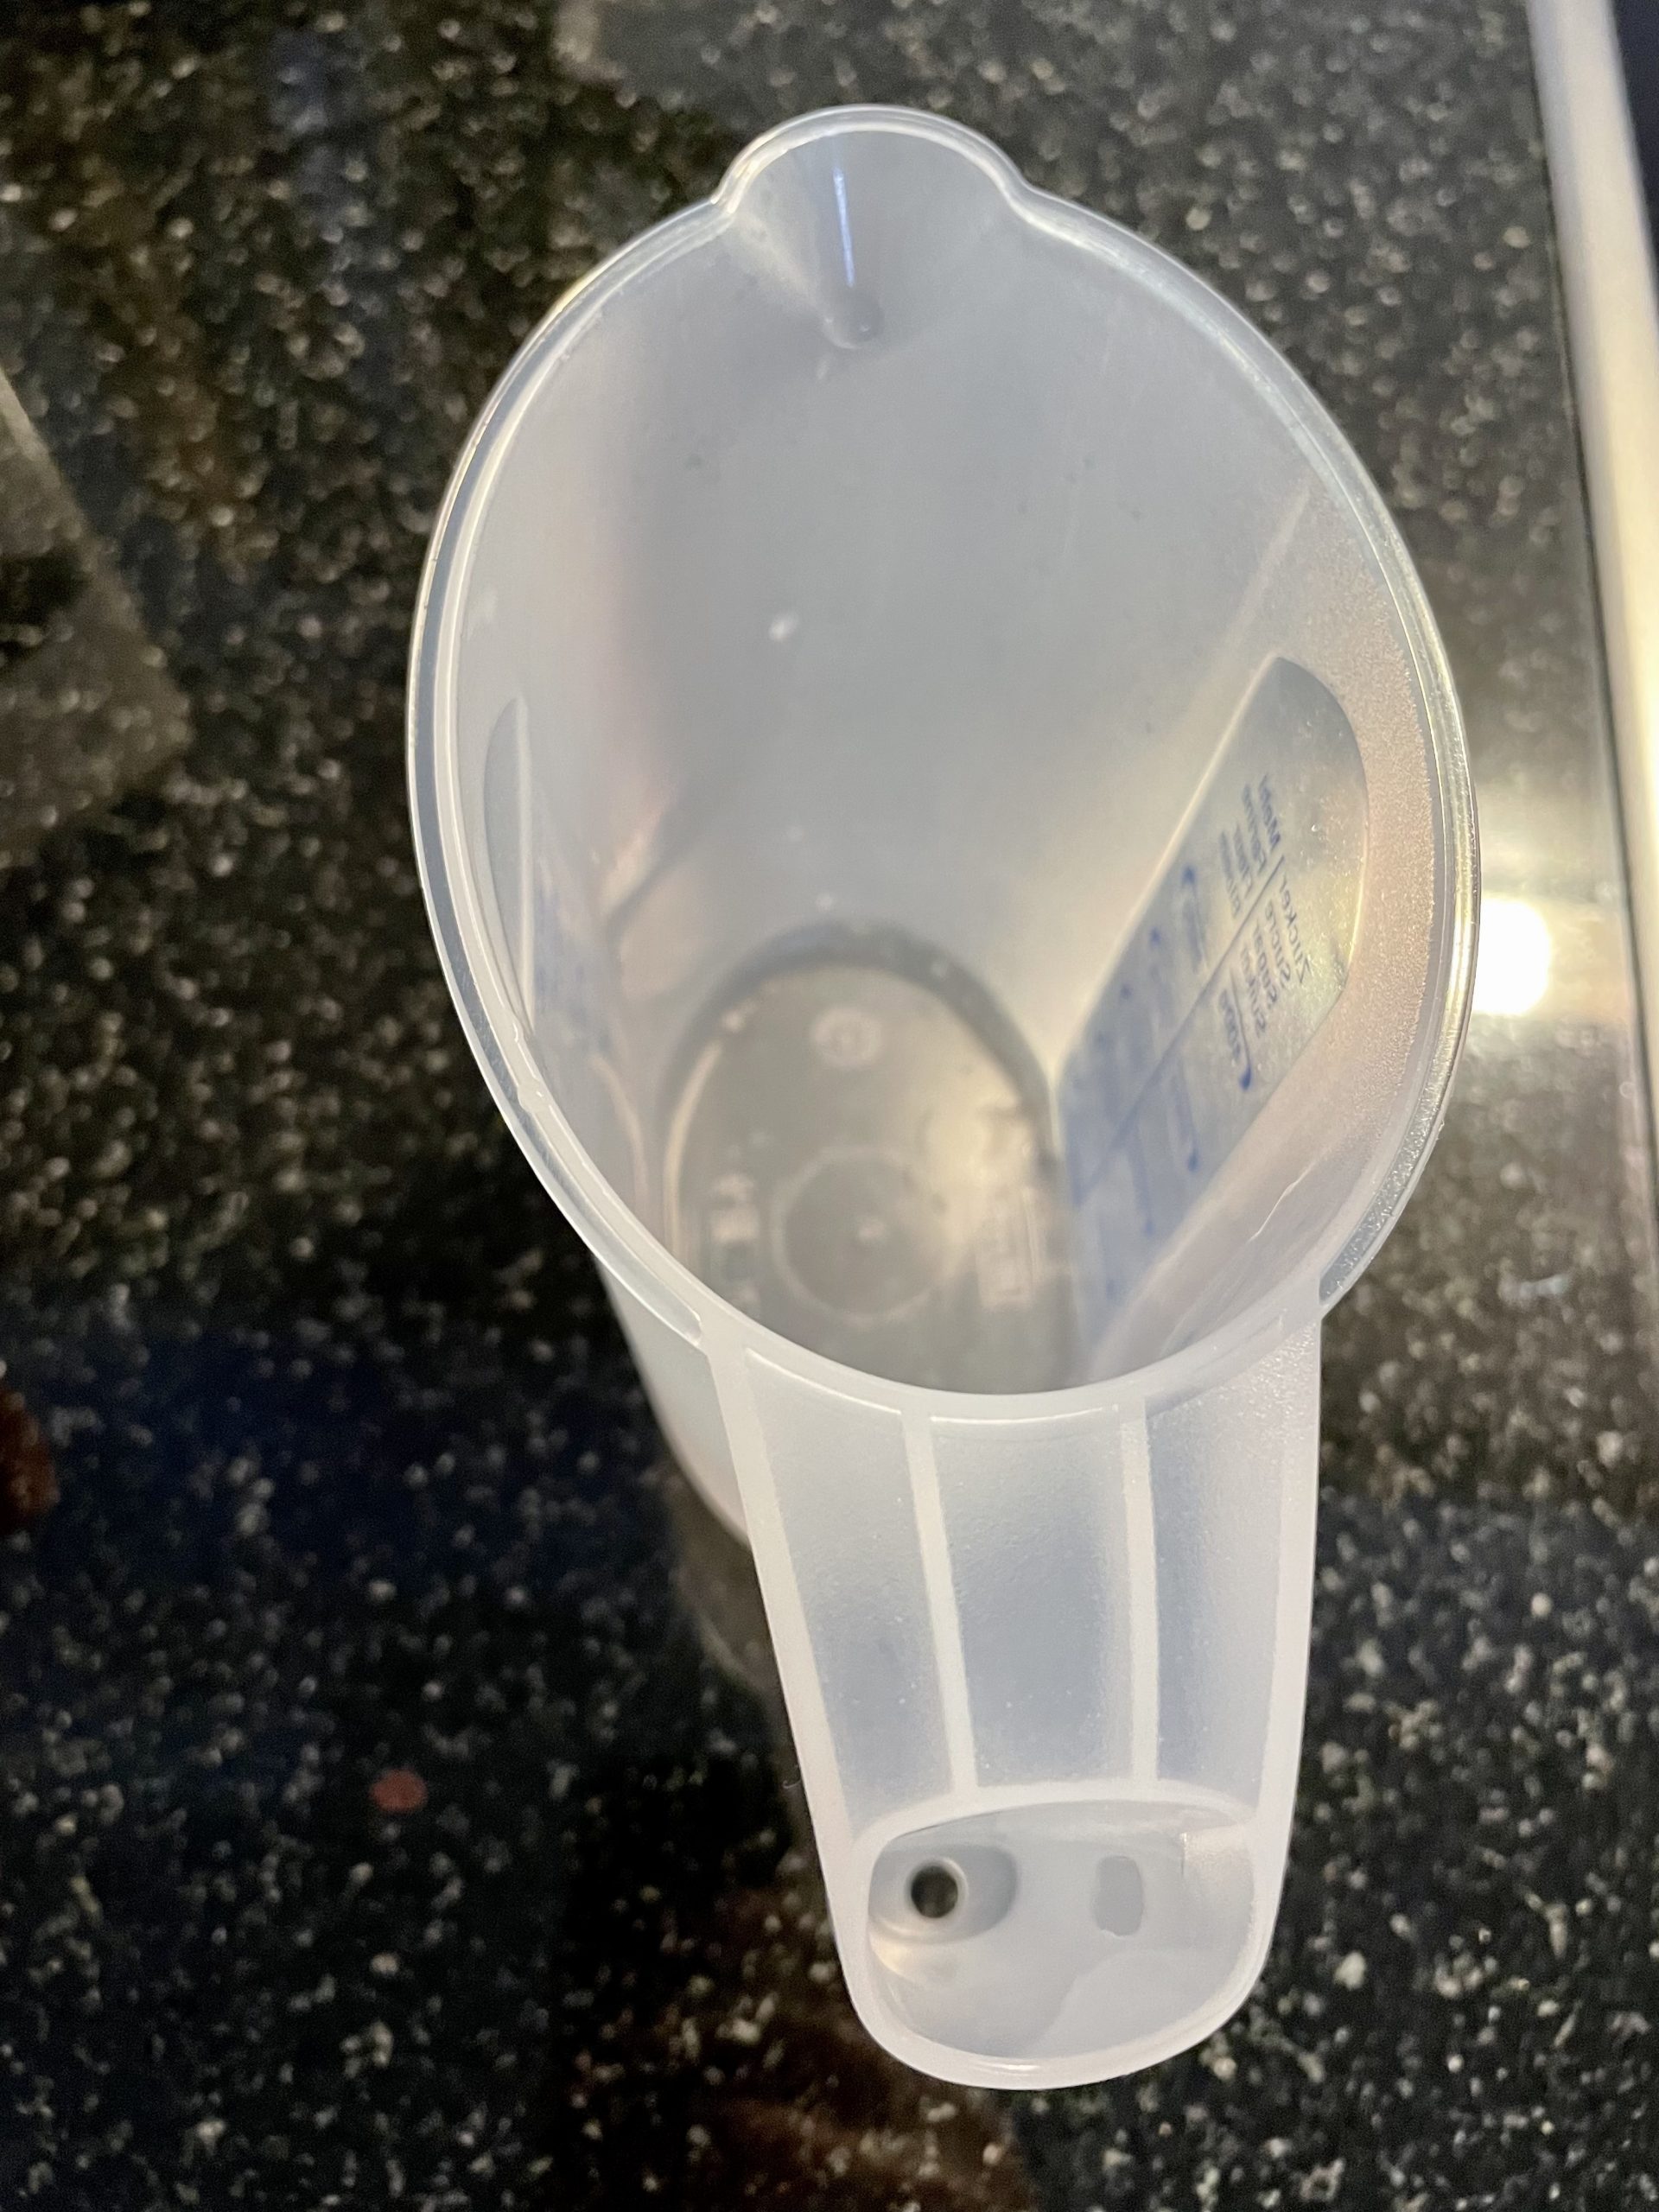
If we placed this mug correctly, i.e. upside-down in the dishwasher, dishwater would instead collect in the now concave, open part where the handle is attached to the mug. As strangely, the designer apparently didn’t think of designing holes there (or of sealing off the whole handle, making all surfaces convex), so that water could drain between the fins.
What can you do?
Make it a habit: Before purchasing any such item, think twice about how you would place it in the dishwasher and whether dishwater could fully drain from the product like that. Don’t simply rely on the “dishwasher safe” symbol on the packaging, as that (sadly) doesn’t cover the shape of the product, only its materials (all products shown in this blog post ironically have an embossed “dishwasher safe” logo)
For those faulty “dishwasher-friendly” products you already own, take a drill and drill some holes in appropriate places yourself (keep in mind structural stability too though). Or, probably better for most plastics, use a heated awl to create clean holes without splinters.
If you are a product designer, please think more thoroughly when designing your next product. Obviously, the free market isn’t as perfect as consumers would wish for, and thus likely wouldn’t punish you as hard for releasing a suboptimal or faulty product as you’d deserve. Please think through the designs of your products nonetheless, before considering them ready for production release. IOW: Minimalism isn’t a bad principle per se (actually beneficial in many situations), but always know when to apply it and when not to apply it (i.e. invest a bit more in thinking -> your brain will automatically protect you from overthinking anyway, e.g. in “fight or flight” situations). In the long run, both the selling market and the job market should reward your superior work and work ethics.
If you’re specifying requirements for certification labels: Please think thoroughly, and particularly also think from an end-user’s perspective. In the end, a label/certification should help purchasers to make better purchasing decisions and sellers of good, certified products to differentiate more visibly from their inferior competitors. A disclaimer regarding the above example: The “dishwasher safe” logo might not actually be an official, certified label, despite its pretty uniform look. It nonetheless raises the question: What’s the value of a “dishwasher safe” logo if that only covers the materials, but not also the shape of the product? From a purchaser’s perspective, an allegedly “dishwasher safe” product that doesn’t allow all dishwater to drain at least in one viable, stable position in the dishwasher is just as useless as a product that severely deforms, shrinks or melts in the dishwasher. That logo should thus cover both materials and shape (i.e. form and function).
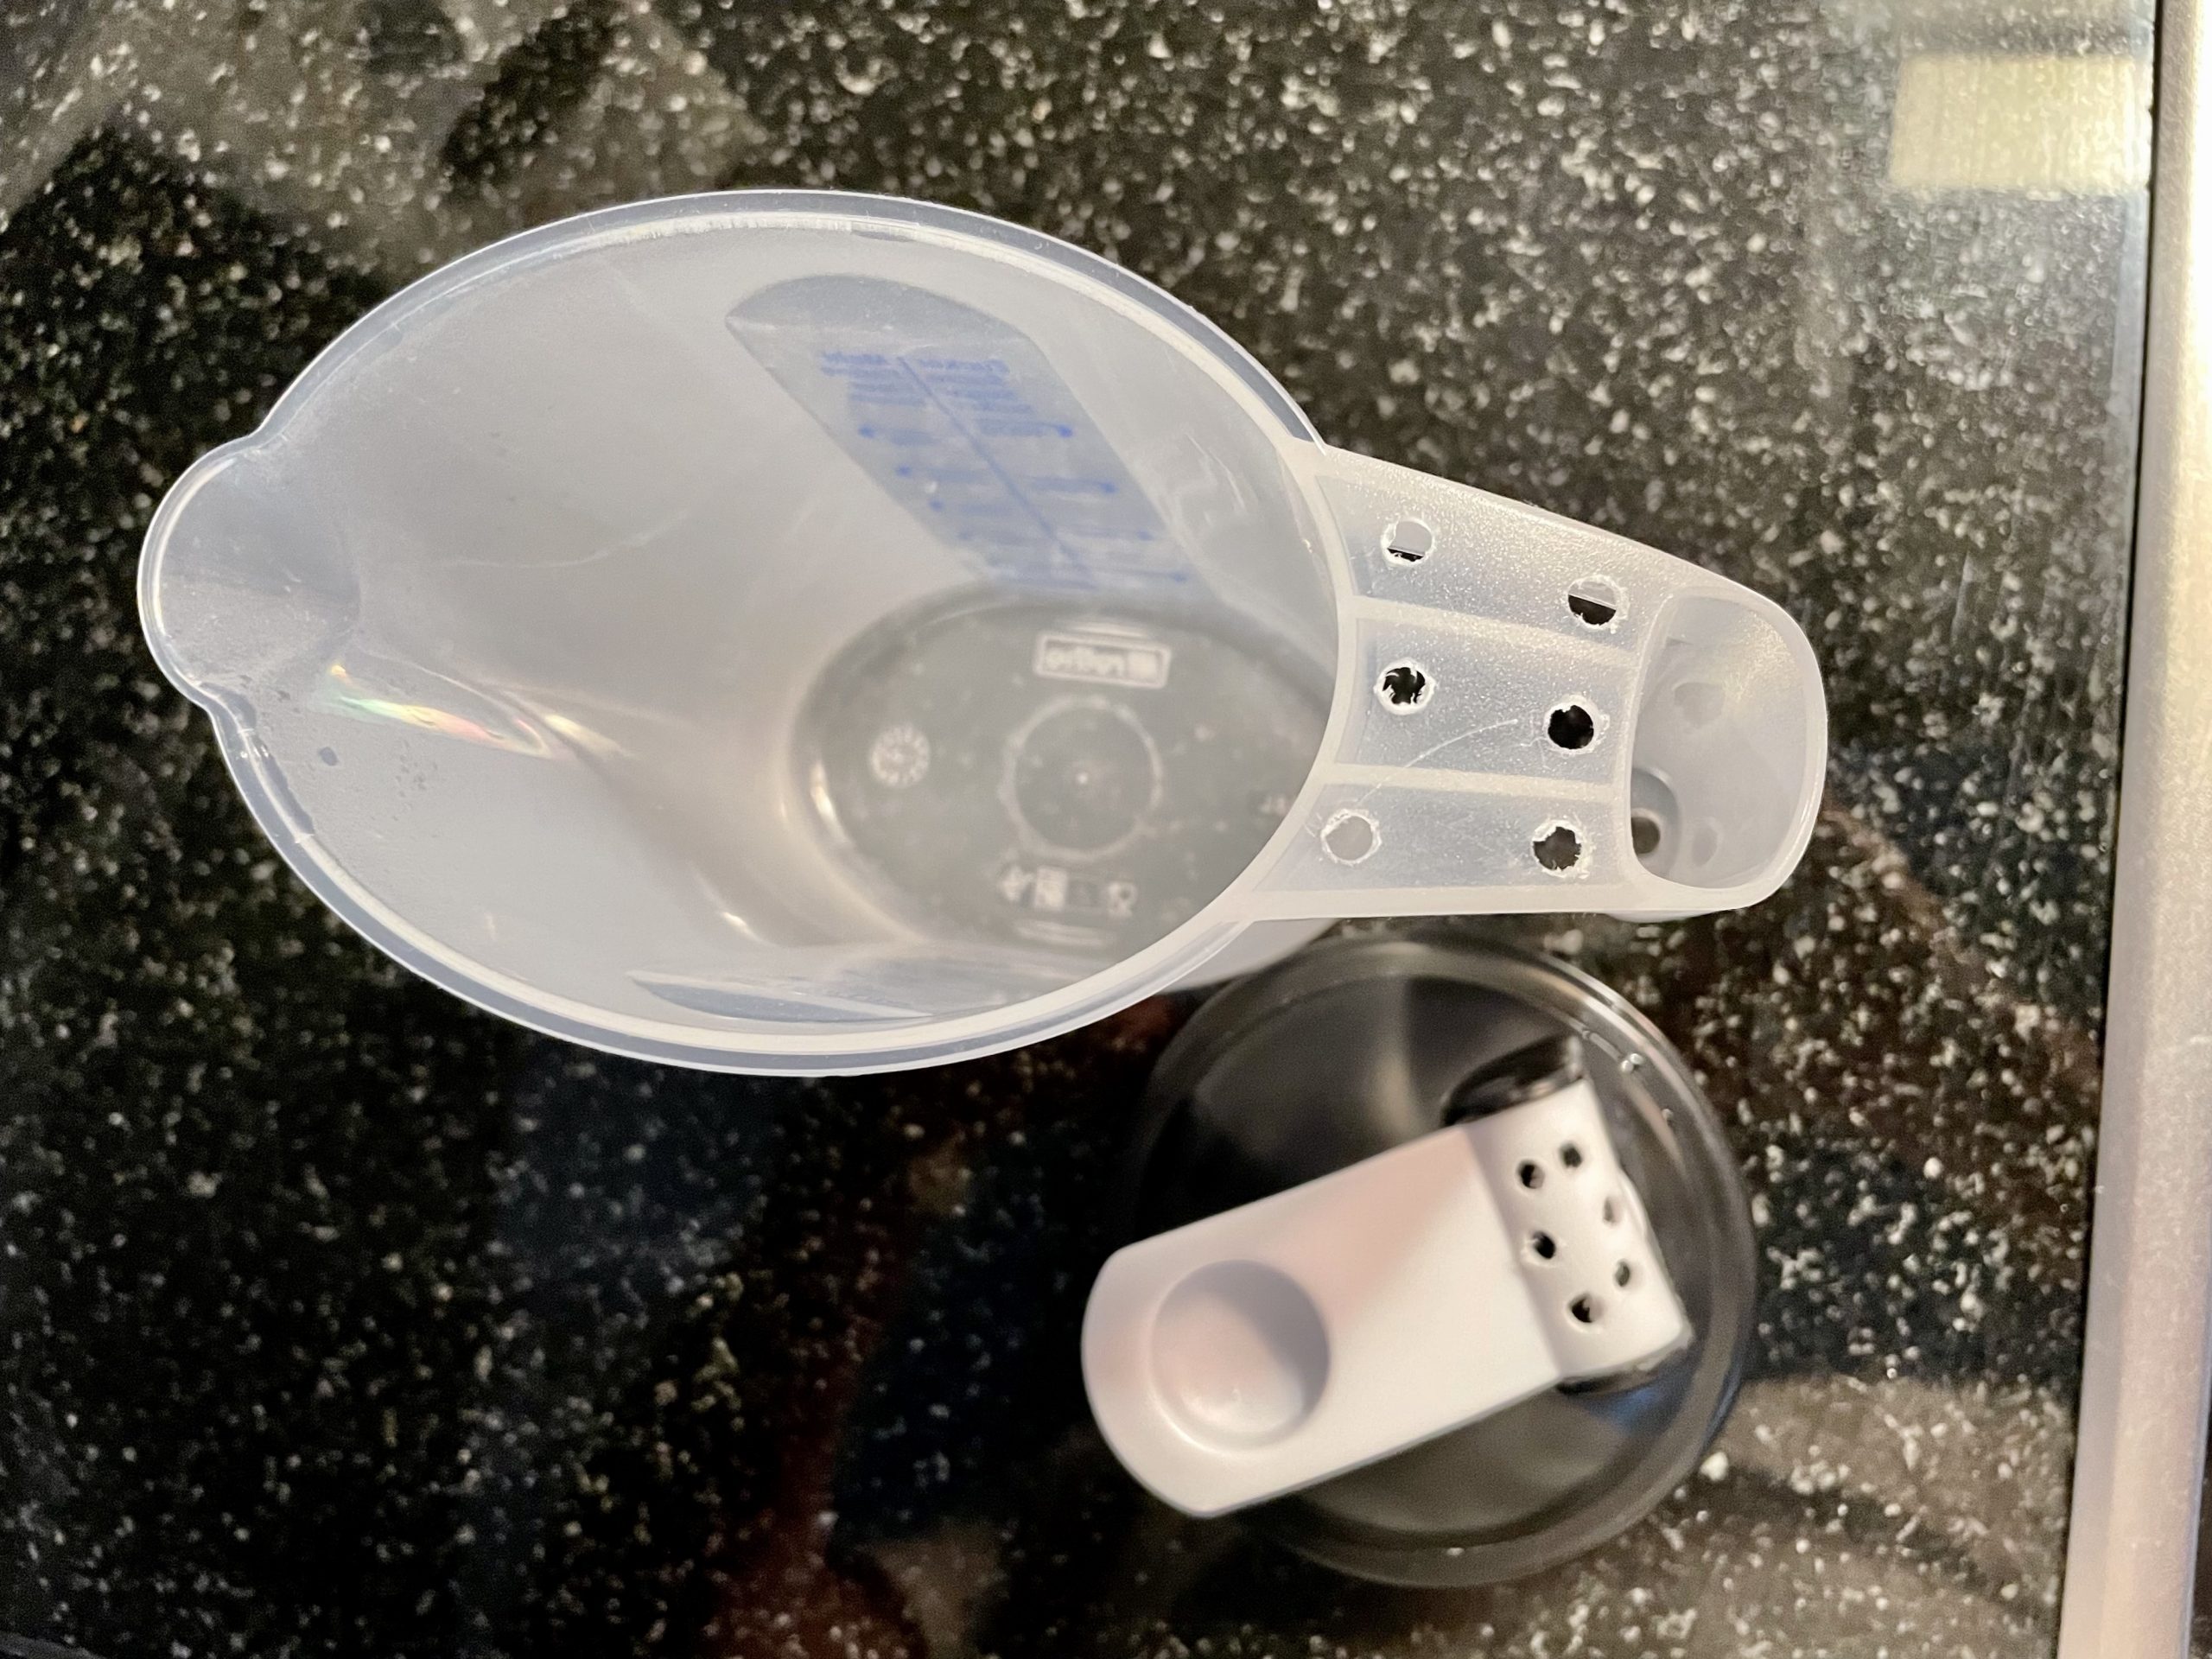
The actual fix, if you already have faulty products
Example of two quick-fixed “dishwasher safe” products, the above mug and the lid of a shaker (both before final cleaning of splinters). Also note that these fixes have no significant negative impacts on the structural stability, reliability and durability of the products:
Other faulty “dishwasher friendly” products
Unfortunately, there are countless other examples! Check the bases of your coffee cups: Are they fully flat? Or rather slightly concave, as so often? If the later, are there any slits/gaps in the base so that dishwater can nicely drain when placing the cups in the dishwasher upside-down? Similar: Bowls, glasses, plates I haven’t tried fixing those myself yet, but milling slits/gaps with a multifunction rotary tool (e.g. Dremel) might be worth trying.
To regenerate the “open with” context menu in macOS (and reopen Finder windows), execute the following two commands in Terminal:
$ /System/Library/Frameworks/CoreServices.framework/Frameworks/LaunchServices.framework/Support/lsregister -kill -r -domain local -domain system -domain user
$ killall Finder
Apparently, there’s a macOS bug that if your Mac has been connected to a Thunderbolt Display for a long time, the brightness of the display can no longer be adjusted (neither by pressing the according F1/F2 keys on your keyboard nor by using the brightness slider in the display settings of the system preferences).
The simple yet surprising fix is:
Unplug your Thunderbolt Display’s Thunderbolt cable, and plug it in again
Running handlers: There was an error running gitlab-ctl reconfigure:
letsencrypt_certificate[yourhost.yourdomain.com] (letsencrypt::http_authorization line 3) had an error: RuntimeError: acme_certificate[staging] (/opt/gitlab/embedded/cookbooks/cache/cookbooks/letsencrypt/resources/certificate.rb line 20) had an error: RuntimeError: [yourhost.yourdomain.com] Validation failed for domain yourhost.yourdomain.com
Running handlers complete Chef Client failed. 11 resources updated in 11 seconds
Warnings:
Let’s Encrypt is enabled, but external_url is using http
The last line is rather misleading, as the domain validation can apparently also fail if one sets external_url = “https://yourhost.yourdomain.com”
If you see the following error when trying to backup a KVM VM image on Proxmox:
ERROR: Backup of VM 100 failed – disk ‘scsi0’ ‘zfsvols:vm-100-disk-1’ (iothread=on) can’t use backup feature currently. Please set backup=no for this drive at /usr/share/perl5/PVE/VZDump/QemuServer.pm line 77. INFO: Backup job finished with errors TASK ERROR: job errors
edit /etc/pve/qemu-server/100.conf, look for a line similar to
Make sure the according VM isn’t running, i.e. the partition not mounted
Adjust the commands below to match your system, use the correct qcow2 image, use the correct fsck-variant, fsck the correct filesystem, note that -p tries to automatically fix errors!
Recently, my beloved Logitech Laser Mouse G9x showed signs of a broken, i.e. shorted cable. This is a well-known problem with these mice – I had a Laser Mouse G9 before and it suffered from the same problem, and the forums are full of similar reports. It’s also well-known however, that the G9/G9x is one of the best and most wanted fingertip grip mice apart from its cabling weakness (and if you use a mouse for 14+ hours daily or if you’re a pro gamer, you won’t ever want to use any other grip (video)).
Unfortunately, Logitech doesn’t produce the G9/G9x model anymore – though they probably could have easily fixed this weakness in the next revision and even improved some other aspects, like reducing the mouse’s weight. One thus has to find a dealer that still has some G9/G9x mice on stock (and accept a high “connoisseur’s” price, these mice usually sell for around 250 USD – mind fakes!) or go with a not quite equivalent, but similar Alienware TactX mouse (which is based on the G9/G9x and produced by Logitech). Alternatively, one can try soldering and fixing the shorted cable or order a spare cable from China, which are both better options than throwing away an otherwise still working mouse.
This allows me to only emphasize those points that deserve special attention:
Be aware that this repair requires advanced manual skill due to the somewhat unfortunate cabling inside the mouse and the not very maintenance-friendly attachment of the flex flat cable.
I’d strongly recommend ordering new replacement mouse feet as it’s almost impossible to remove the feet without tearing them, particularly if you’ve used the mouse for some years already. To remove the remaining glue, I used ethanol, but something hydrophobic (e.g. straight-run gasoline) might actually work better [Warning: Disconnect your mouse before doing this!].
I used my Victorinox CyberTool 34’s (video) phillips screwdrivers and it worked fine, but if you have thinner screwdrivers at hand, use those, as some of the smaller screws are a bit difficult to reach.
The most tricky thing to reassemble, in my view, is the mouse cable inside the mouse, which is laid out and bent in quite an odd (and scary) way. It’s also the reason why most of the G9x/G9 suffer from a shorted cable sooner or later. You have to bend and route the bundled wires in a way that they neither cover the hole for the screw in the bottom shell, nor the according plastic nut in the upper shell. This puts a lot of stress on the inner mouse cable and requires quite some manual force.
Other not so easy things:
Detaching the flex flat cable/ribbon (for the LEDs in the upper shell) without popping off the little latch (using a flathead screwdriver works though)
Putting the rubber grommet in place again (you need to apply quite some force and the grommet doesn’t really fit very well anyway)
For now, I’ve just quickly replaced the whole cable with a new one, but I will try fixing the old, damaged cable with my new Ersa i-CON1 digital solder station when I find time for it.
What I particularly like about the Logitech Laser Mouse G9x:
Its perfect geometry for finger tip grip users
Good quality of plastics, springs, buttons, wheel, laser sensor
Moderate weight (extra weights removed) as compared to the Mad Catz R.A.T. 7 (extra weights removed) – it’s still quite heavy though compared to other mice, this could be improved (if you intend to lift your mouse often, this is the wrong mouse)
Removable shells
“Hyper-fast scrolling” (this almost seems like a USP of Logitech – I like this feature a lot!)
Good, stable drivers
Has well-placed back and forward buttons with clearly defined clicking points
It’s a wired mouse, there’s thus no need to replace batteries, no risk of running out of battery in the worst possible moment, no added weight, no lag.
– terrible, totally unusable Mad Catz drivers (works well on Mac OS X though using the SteerMouse driver version 4.2.3 and newer – I tested a beta version of it – thanks, Yoshi!)
+ super customizable and adjustable geometry
+ handy precision-aim button (can also be programmed to show Mission Control or the desktop, for example)
+ handy horizontal thumb scroll wheel
Mad Catz R.A.T. 5:
If you can do with fewer or without customization options, the R.A.T. 5 or 3 will likely suit your needs as a fingertip grip user more as they’re lighter and smaller.
If you don’t care about (supposedly) durable, high-quality material, some of the other Mad Catz mice might be good alternatives too (e.g. the hard-plastic mice are generally lighter than those incorporating steel and/or aluminium)
This pro gamer mouse looks very exciting and promising for fingertip grip users – it looks like the perfect mouse to have, also for non-gamers with that grip. I really hope Mad Catz will dramatically improve their drivers though, as terribly bad drivers is currently their biggest weakness.
Many people, particularly gamers, still like this mouse a lot, despite its age. It has a nice geometry and is light-weight (best for palm grips, but suitable for fingertip grip users with big hands too). I once had and used this mouse too (also its predecessor) and liked it a lot. The sensor is quite outdated (but liked by some gamers for its 400 dpi resolution) and used to prematurely die from one day to another. Nonetheless it was the last good mouse produced under the Microsoft brand.
In a current LUGS mailing list thread, mowgli pointed to the t-prot script as a nice tool to “fix” the so-called (and very common) TOFU style message quoting and some other annoyances (like commercial webmail provider signatures, overly excited !!!! statements, etc.) in e-mail messages. t-prot was originally developed for mutt, but can also be used with other mail clients.
As there wasn’t any t-prot package for my favourite Mac OS X package manager Homebrew yet (apparently only for MacPorts), I quickly created one myself [Edited on Feb 24, 2015: Updated for t-prot version 3.3]:
Create the file /usr/local/Library/Formula/t-prot.rb and add the following (fantastically trivial) content:
require "formula"

class TProt < Formula
  homepage "http://www.escape.de/~tolot/mutt/"
  url "http://www.escape.de/~tolot/mutt/t-prot/downloads/t-prot-3.3.tar.gz"
  sha1 "9be24629abc598b24e887f47e9a62feddc3ed4ad"

  def install
    bin.install 't-prot'
    man1.install 't-prot.1'
  end

end
Install t-prot (run the following Homebrew command in a terminal window):
brew install t-prot
Add the following line to your .muttrc (or check ‘man t-prot’ or the t-prot web page for options and examples):